Meet the lab
How every Network Doodles lab works, shown once: open it with one click, find your way round the lab app and its editor, read the lab’s status, use make, edit a TODO, run the checker, and get unstuck. Each lab’s first task then covers only what’s new in that lab.
Every lab here runs the same way: same editor, same terminal, same make commands, same checker. This page walks
through all of it once, slowly, so the labs themselves don’t have to. Each lab’s first task then covers only
what’s specific to that lab: its network, its logins, its tools.
If you already live in VS Code and a terminal, skim it. If you’ve never opened either, read it all; every lab task also has a new to this? step by step panel for the slow version of just that task.
You don’t need to know Ansible, Python, NetBox or containerlab yet. That’s what the labs are for. The screenshots come from the NetBox lab; every lab looks the same apart from the file names.
What you’re about to run
The whole lab lives in one container, called a dev container. Inside it is everything: the editor, the tools, and its own Docker engine running whatever that lab needs, such as switches in containerlab, NetBox, Batfish or Grafana. The easy way runs that container on GitHub’s machines with Codespaces, so you install nothing at all. If you’d rather run it on your own laptop, that’s the advanced setup at the end.
a codespace  (or your laptop: see the advanced setup)
└── dev container  (the lab: editor + tools + its own Docker)
    ├── the lab app     in your browser: the guide, VS Code and the lab's tools side by side
    ├── VS Code         the lab app's editor tab
    ├── Python, Ansible or Terraform, containerlab, git, make   (whatever this lab uses)
    └── Docker inside the container
        ├── the switches          containerlab: Nokia SR Linux or CapeOS
        └── the lab's services    NetBox, Batfish, Grafana ... (each lab's first task lists them)
1 · Open the lab
All you need is a browser and a free GitHub account.
On the lab’s page, click Open the lab and sign in with GitHub. The first time, GitHub asks you to let Network Doodles Labs manage your codespaces: that’s how the button creates, starts, stops and deletes the lab’s codespace for you. It’s still your codespace, on your account and its free hours.
A page shows your codespace starting, with a bar that fills as it goes. The first start takes 3 to 5 minutes; coming back to it takes about one.
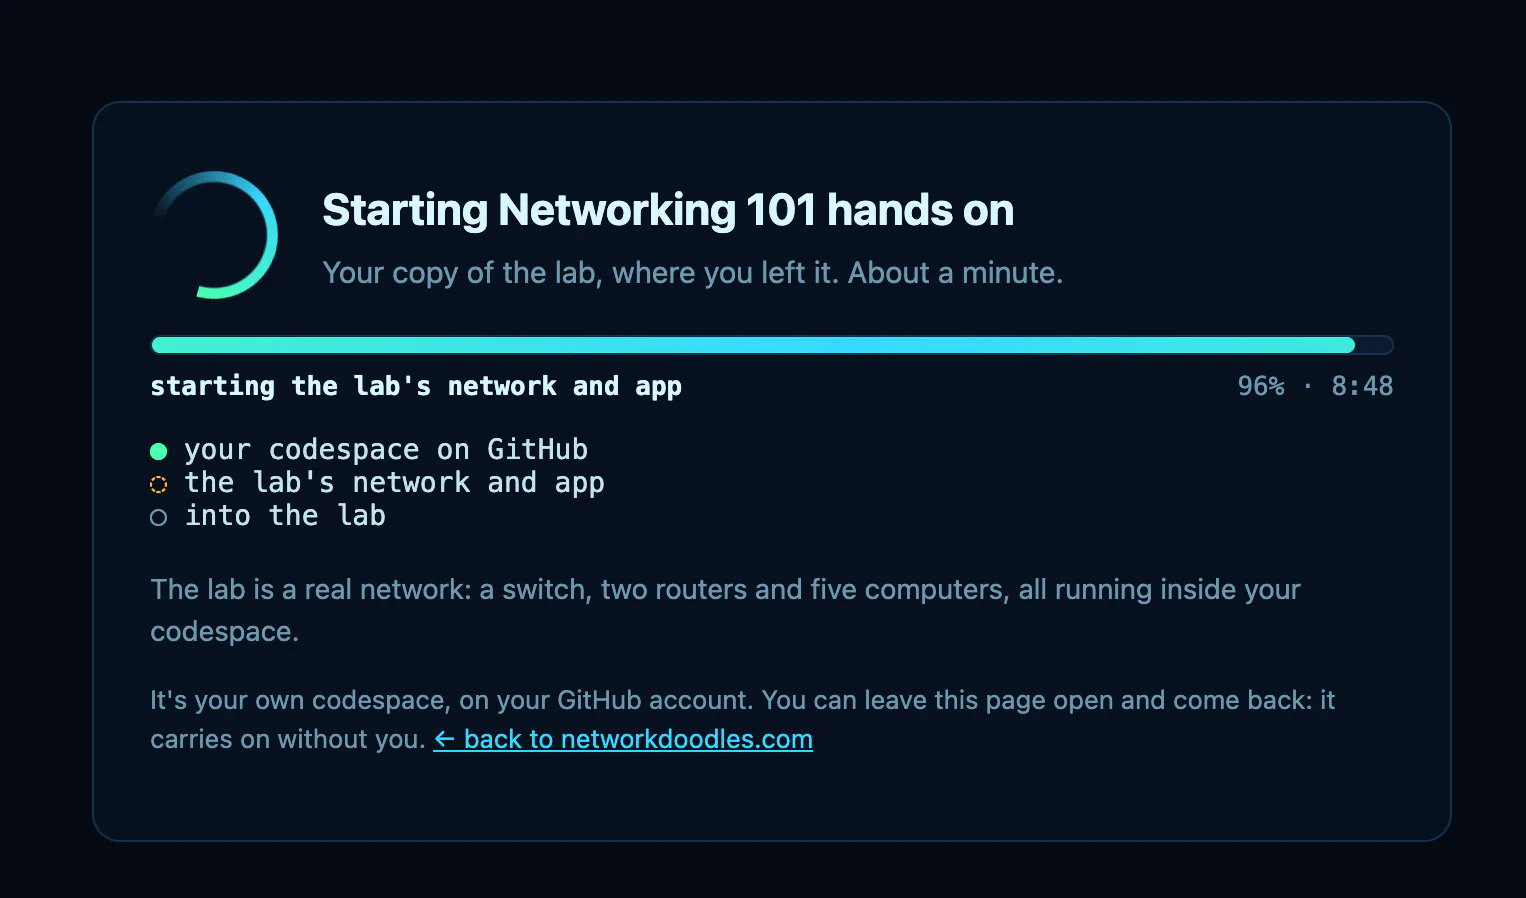
Starting the lab: the bar fills as your codespace starts, then the lab’s network and app. You can leave the page open and come back. The lab app opens: the lab’s guide on the left, VS Code in a tab on the right (most labs; some have a Topology tab instead), and any other tool the lab uses, such as Wireshark, in a tab of its own. The top bar shows the network starting, then network up. That’s you in.
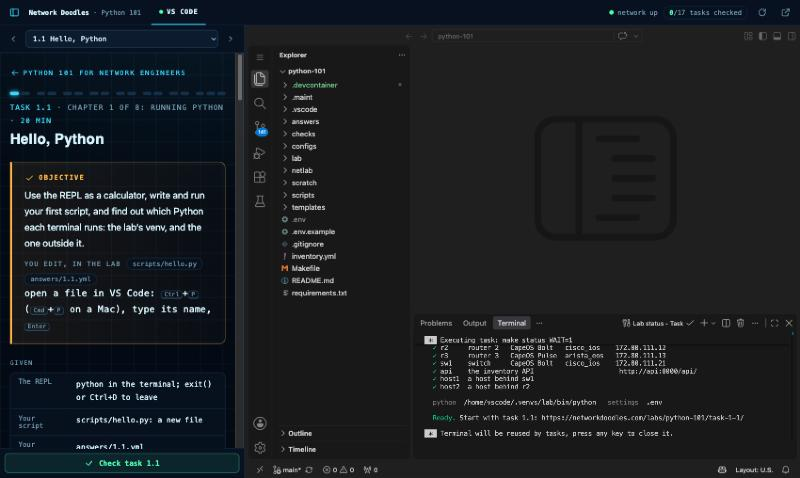
The guide in the lab is the same guide as on this site. Pick a task from the list above it, or follow its links. Check task, under the guide, runs the checker for the task you’re on (step 7). Everything else on this page happens in the VS Code tab.
Labs with a Topology tab
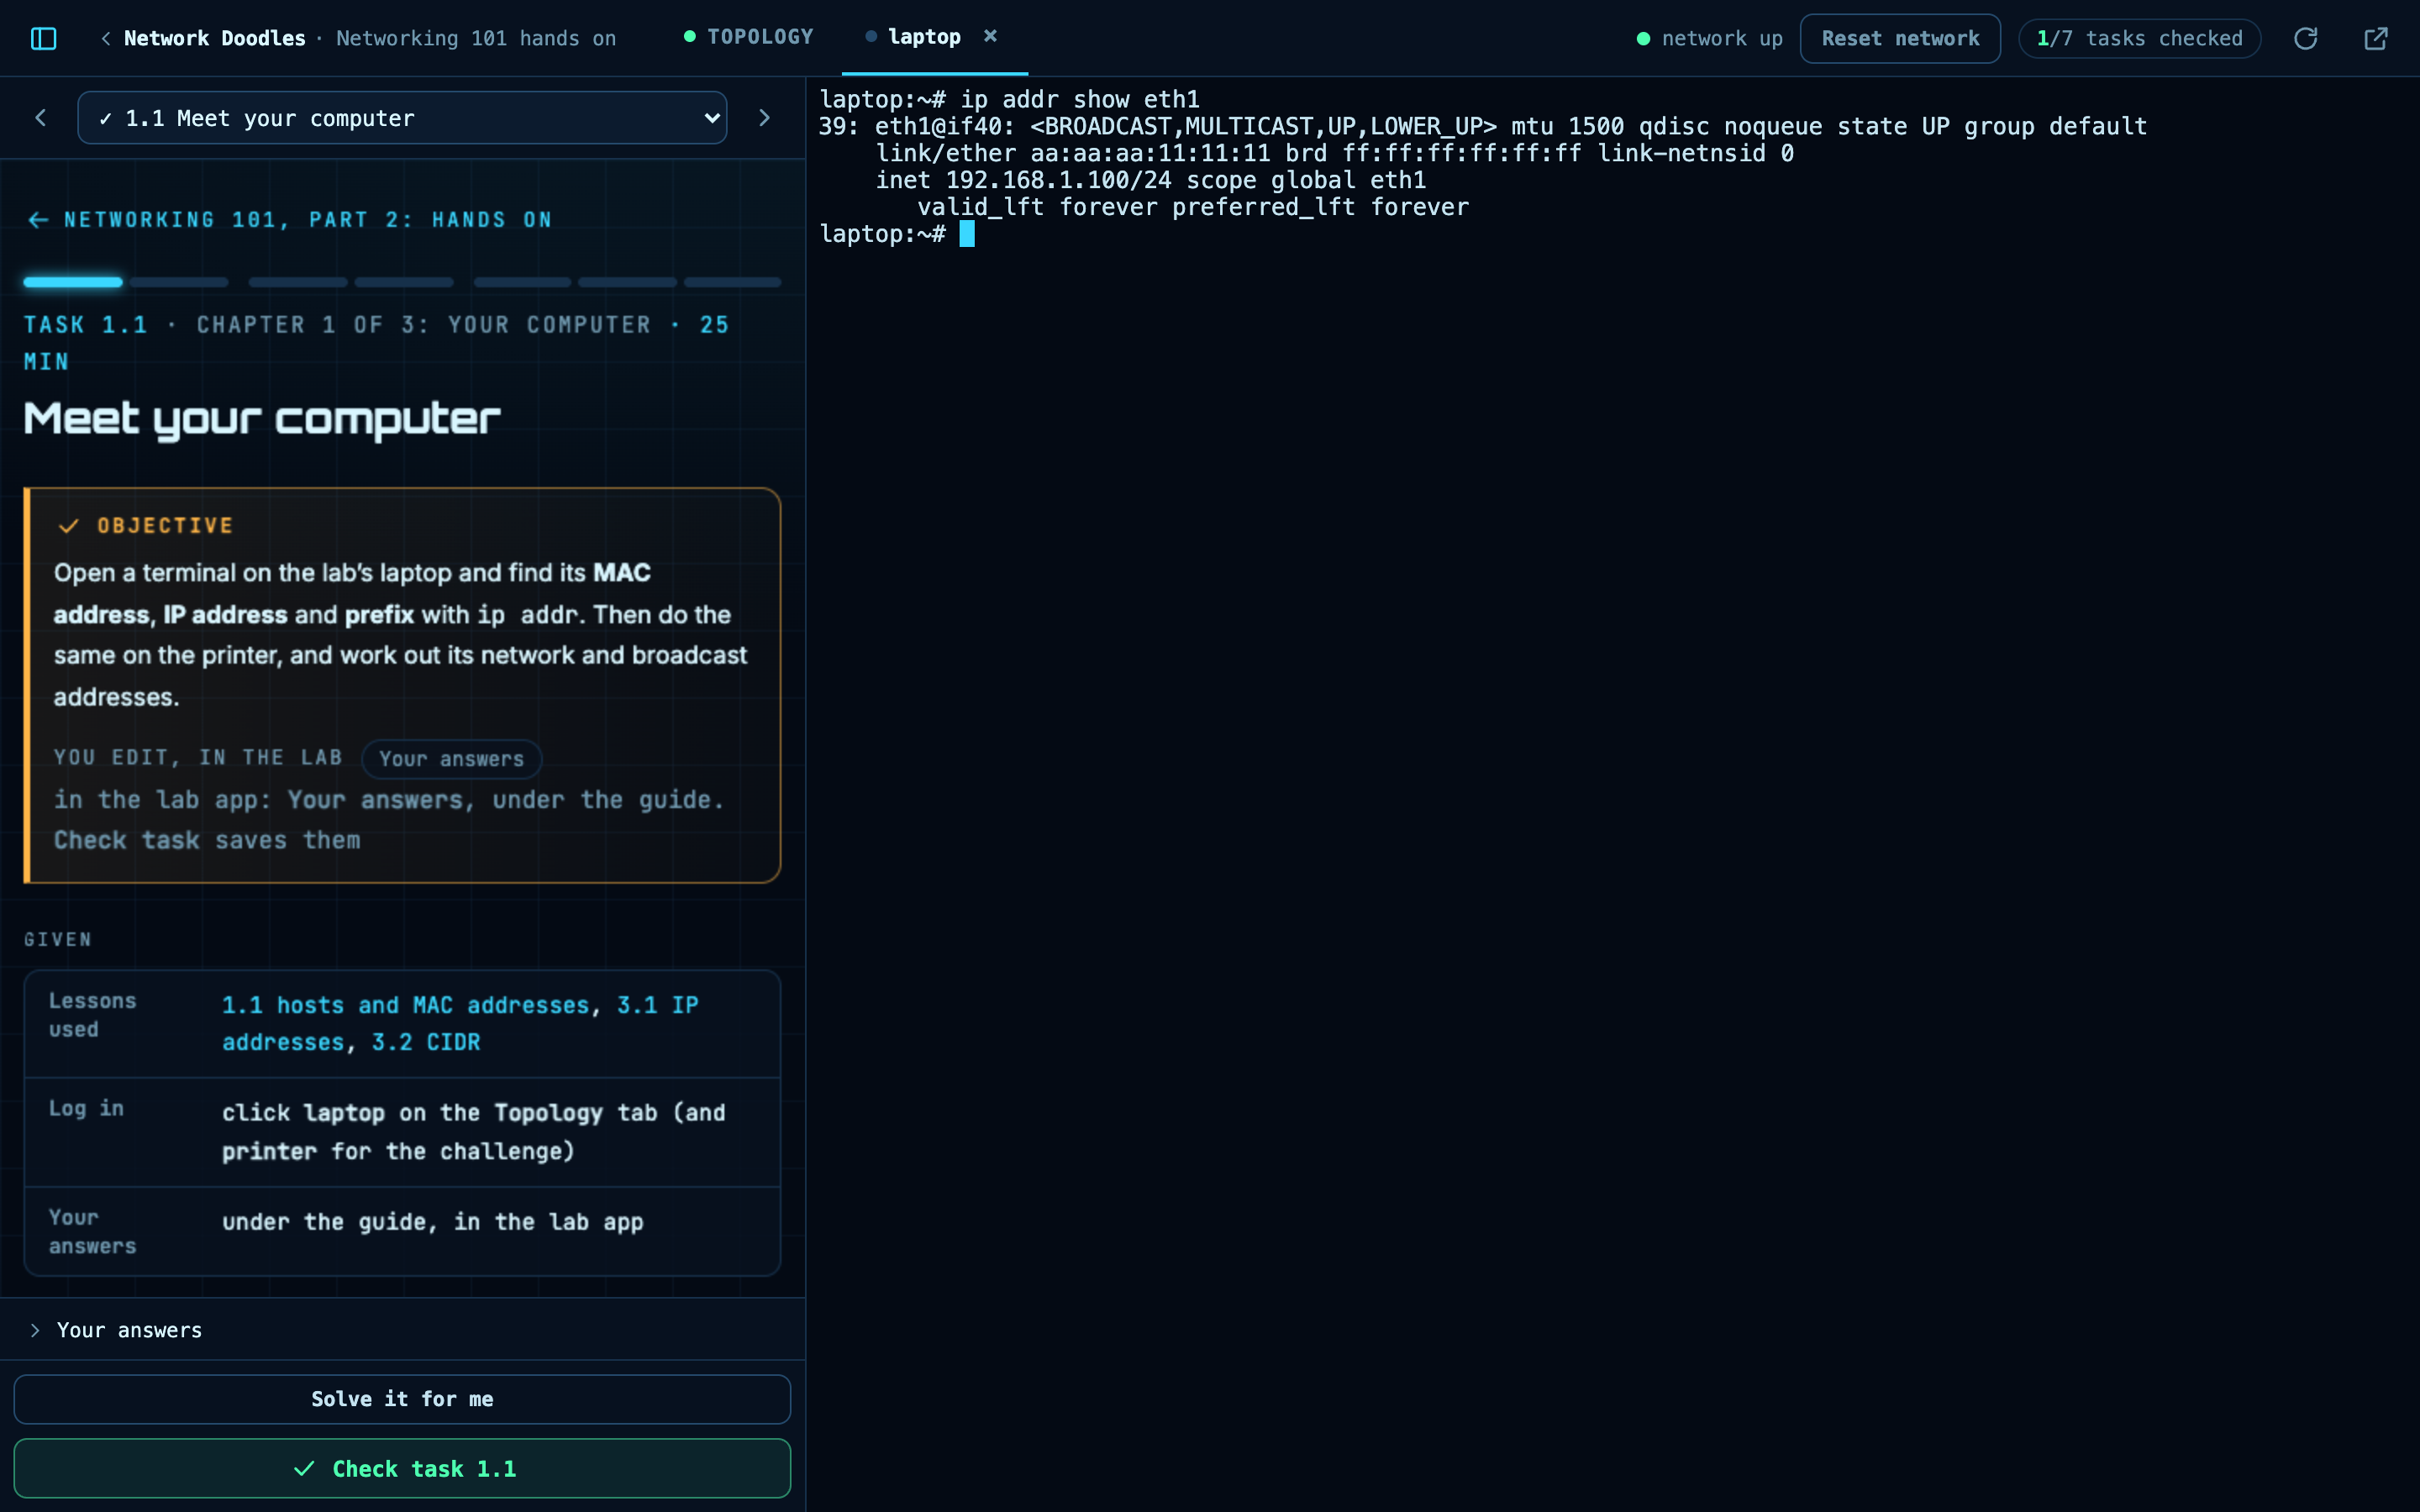
Some labs, like Networking 101, have no VS Code tab. Their first tab is Topology, a drawing of the lab’s network, and you do everything from there and the guide:
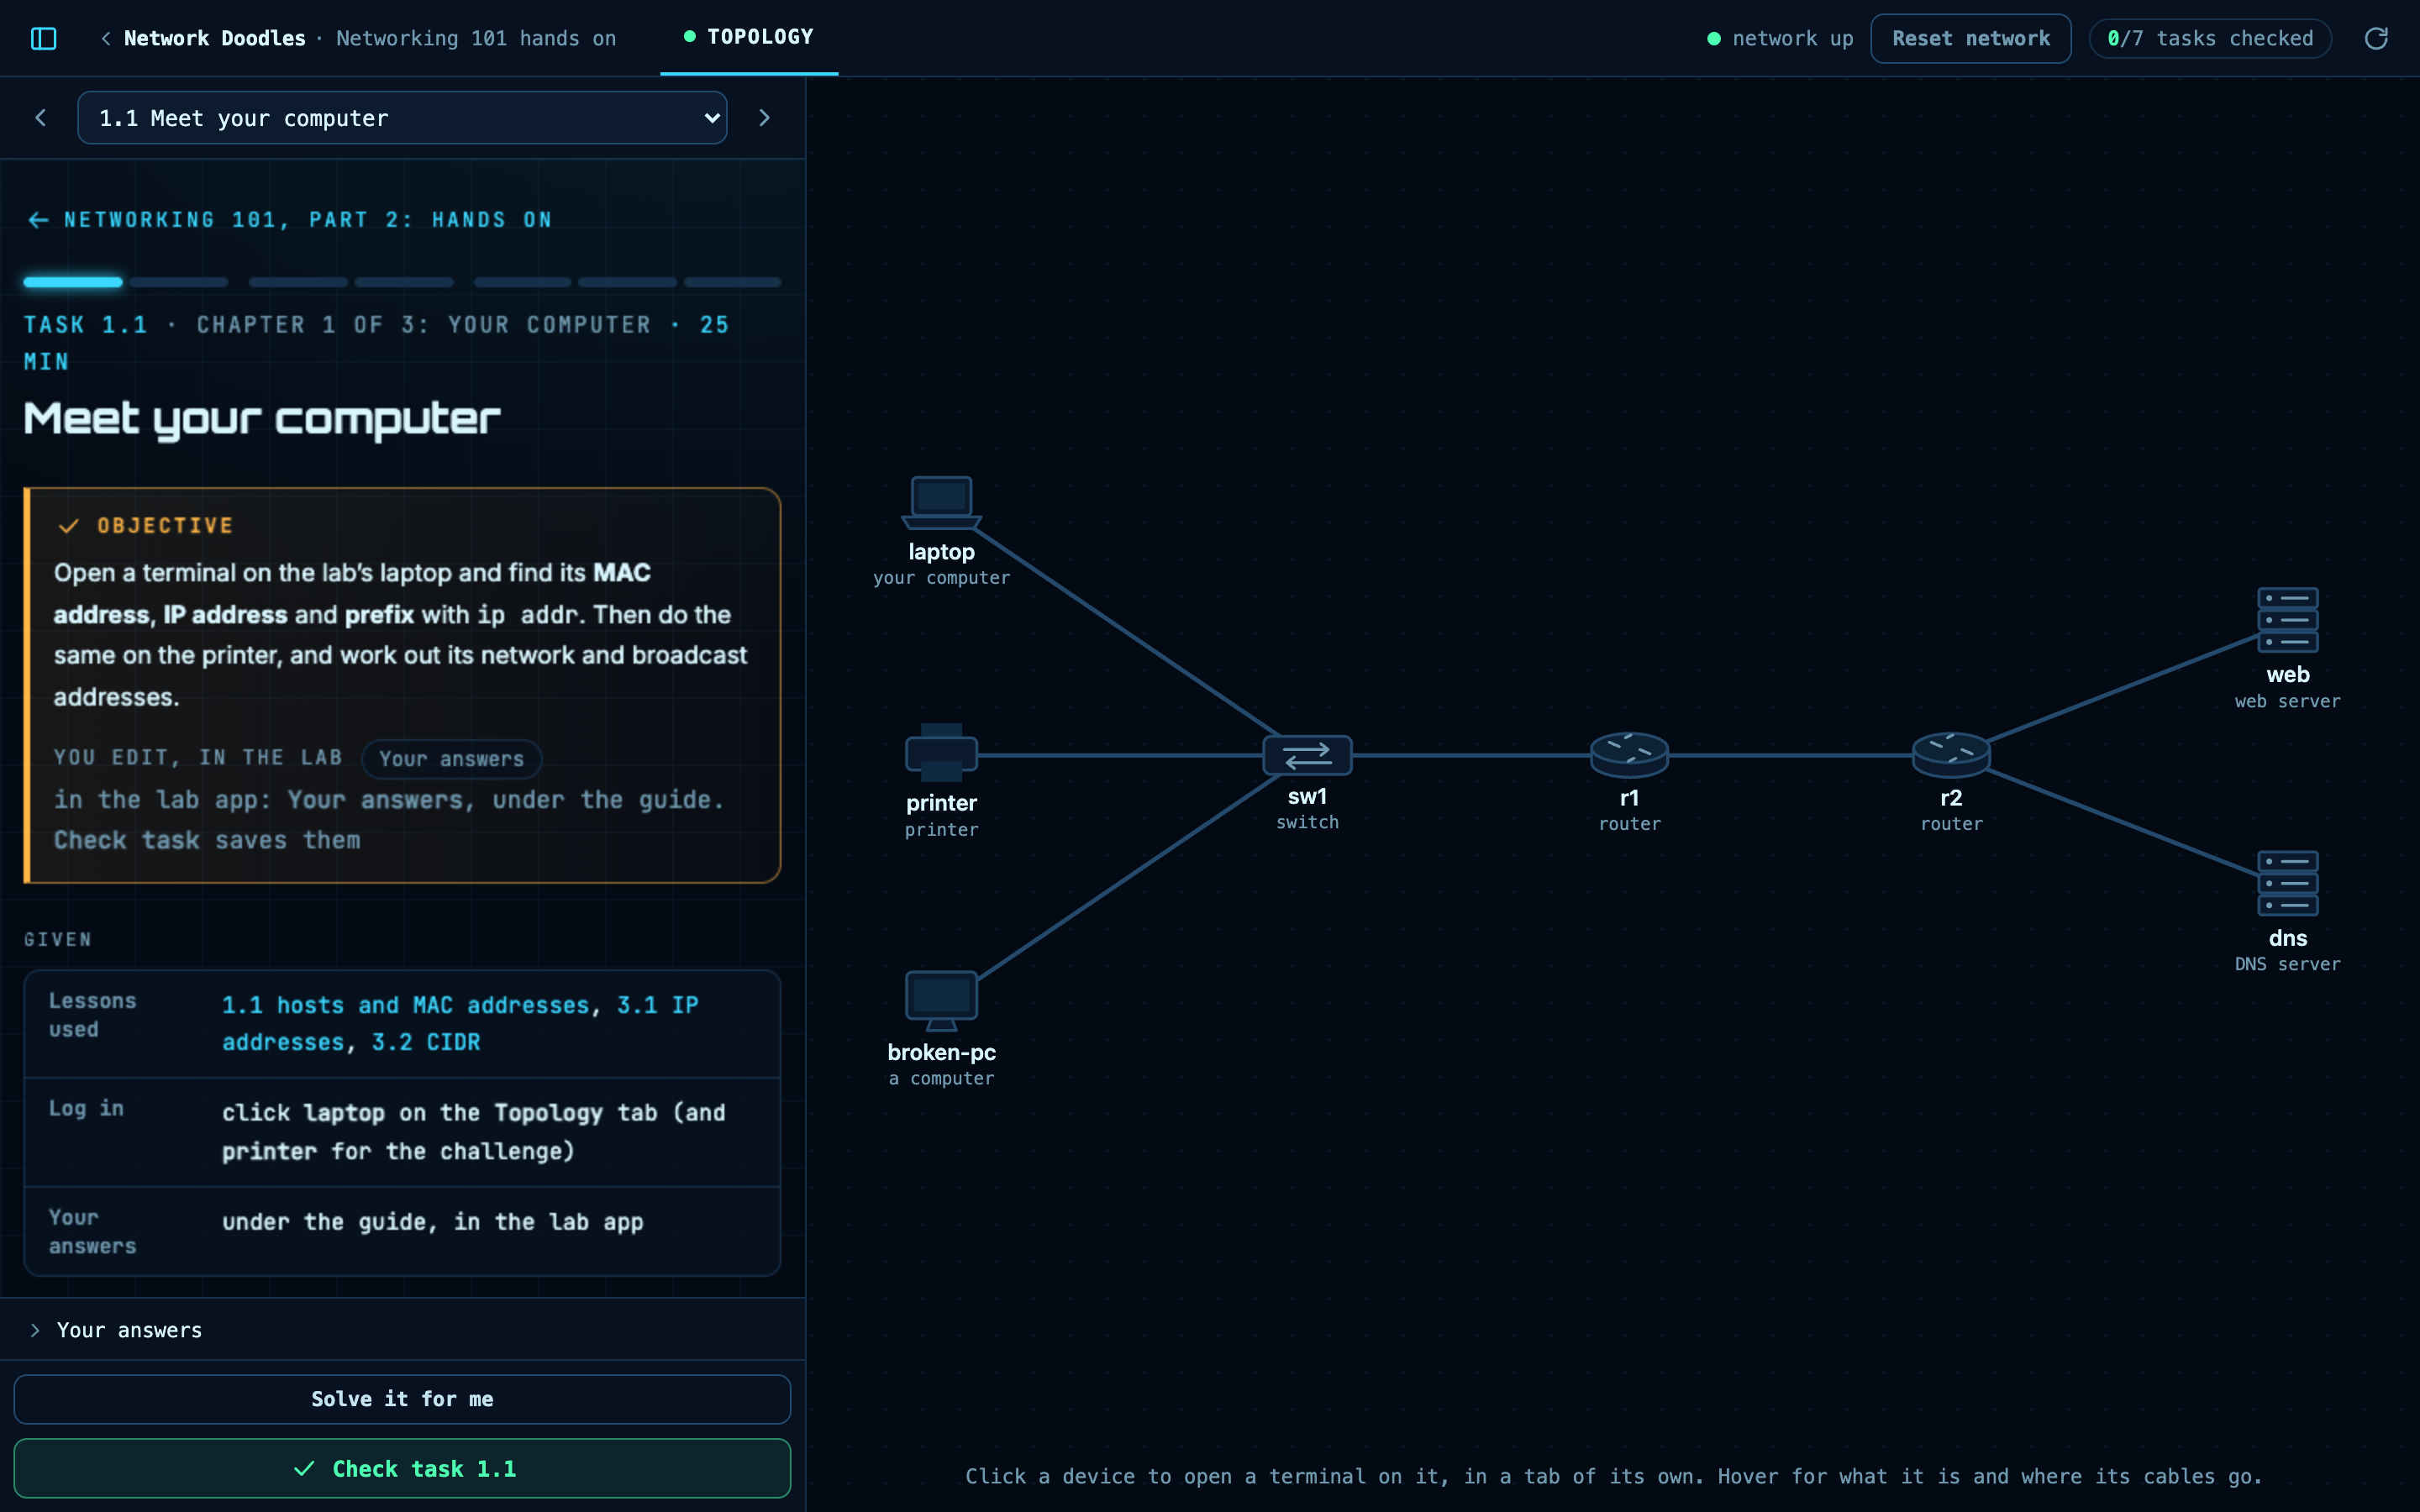
Hover over a device to see what it is, what it runs, where each of its ports is cabled, and whether it’s running.
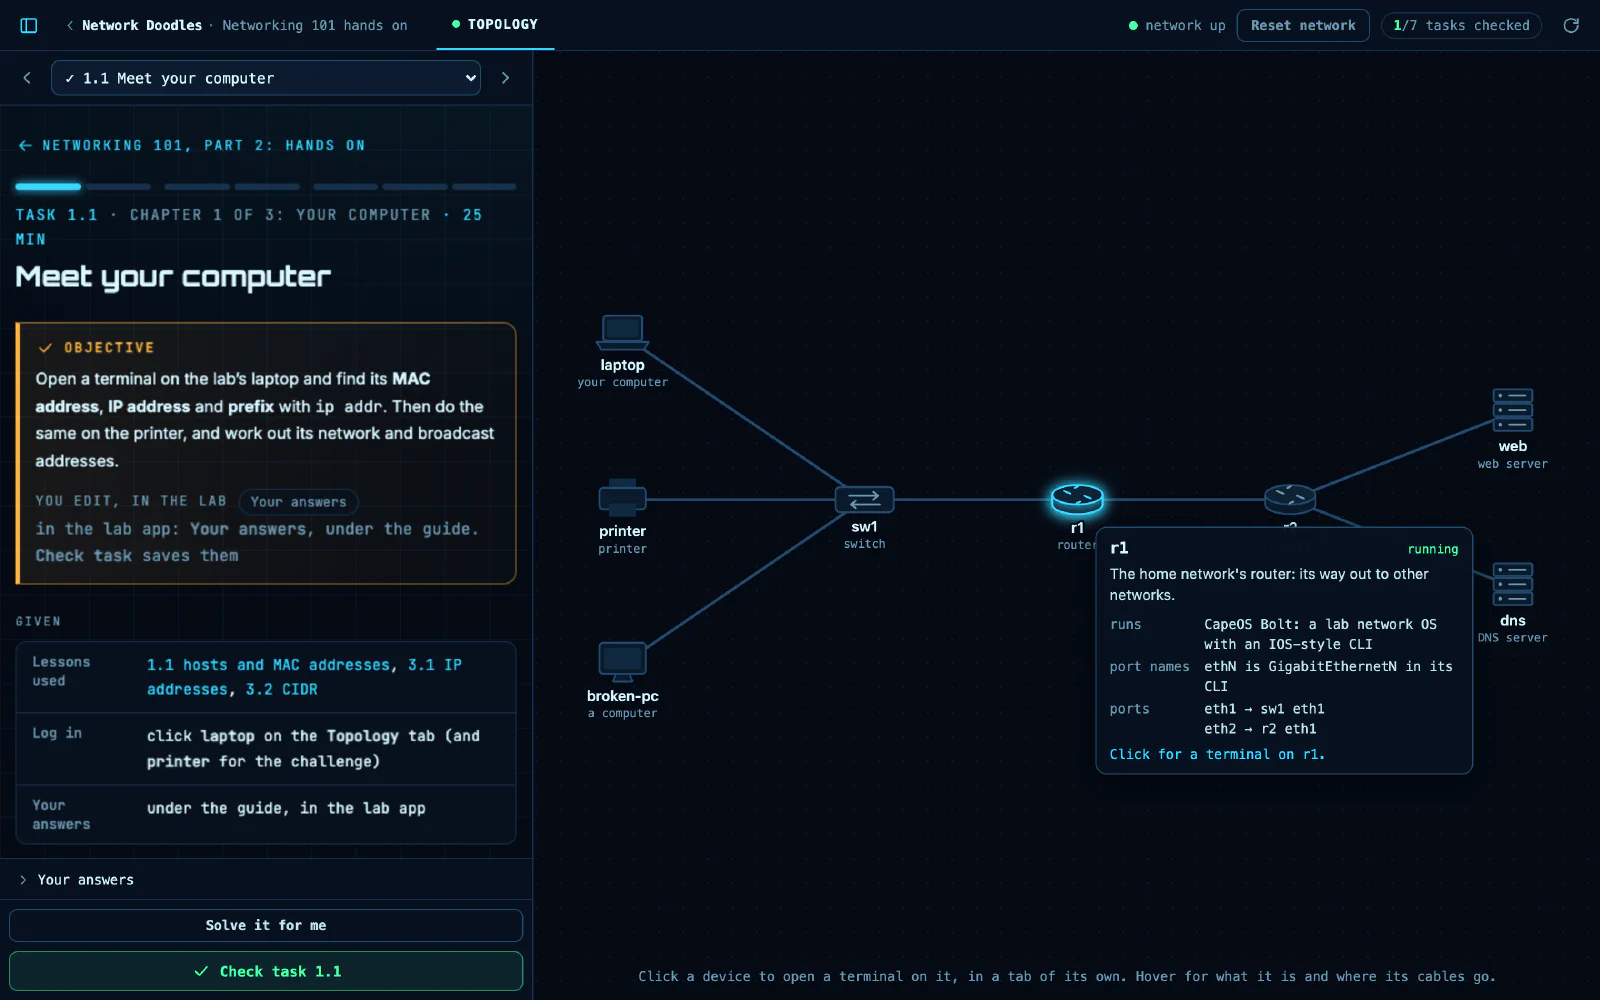
Click a device to open a terminal on it, in a tab of its own named after it. Click it again to go back to that tab. Several can be open side by side; close one with its ×. (Typing
exitends that device’s session; press Enter in the tab to reconnect.)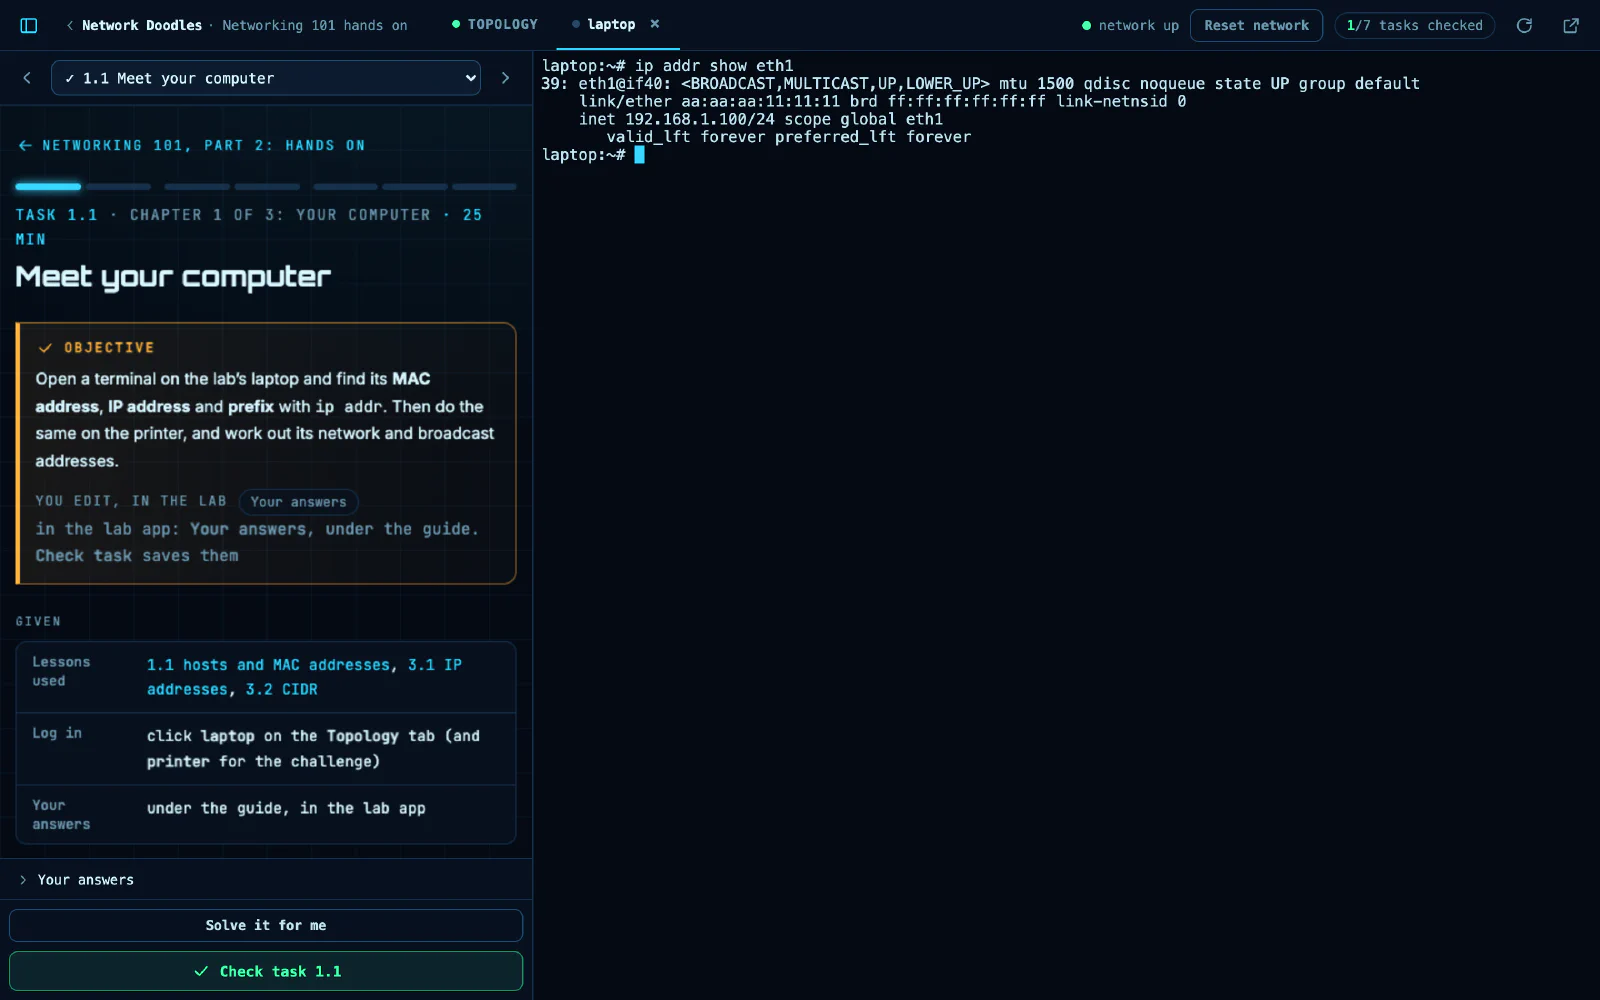
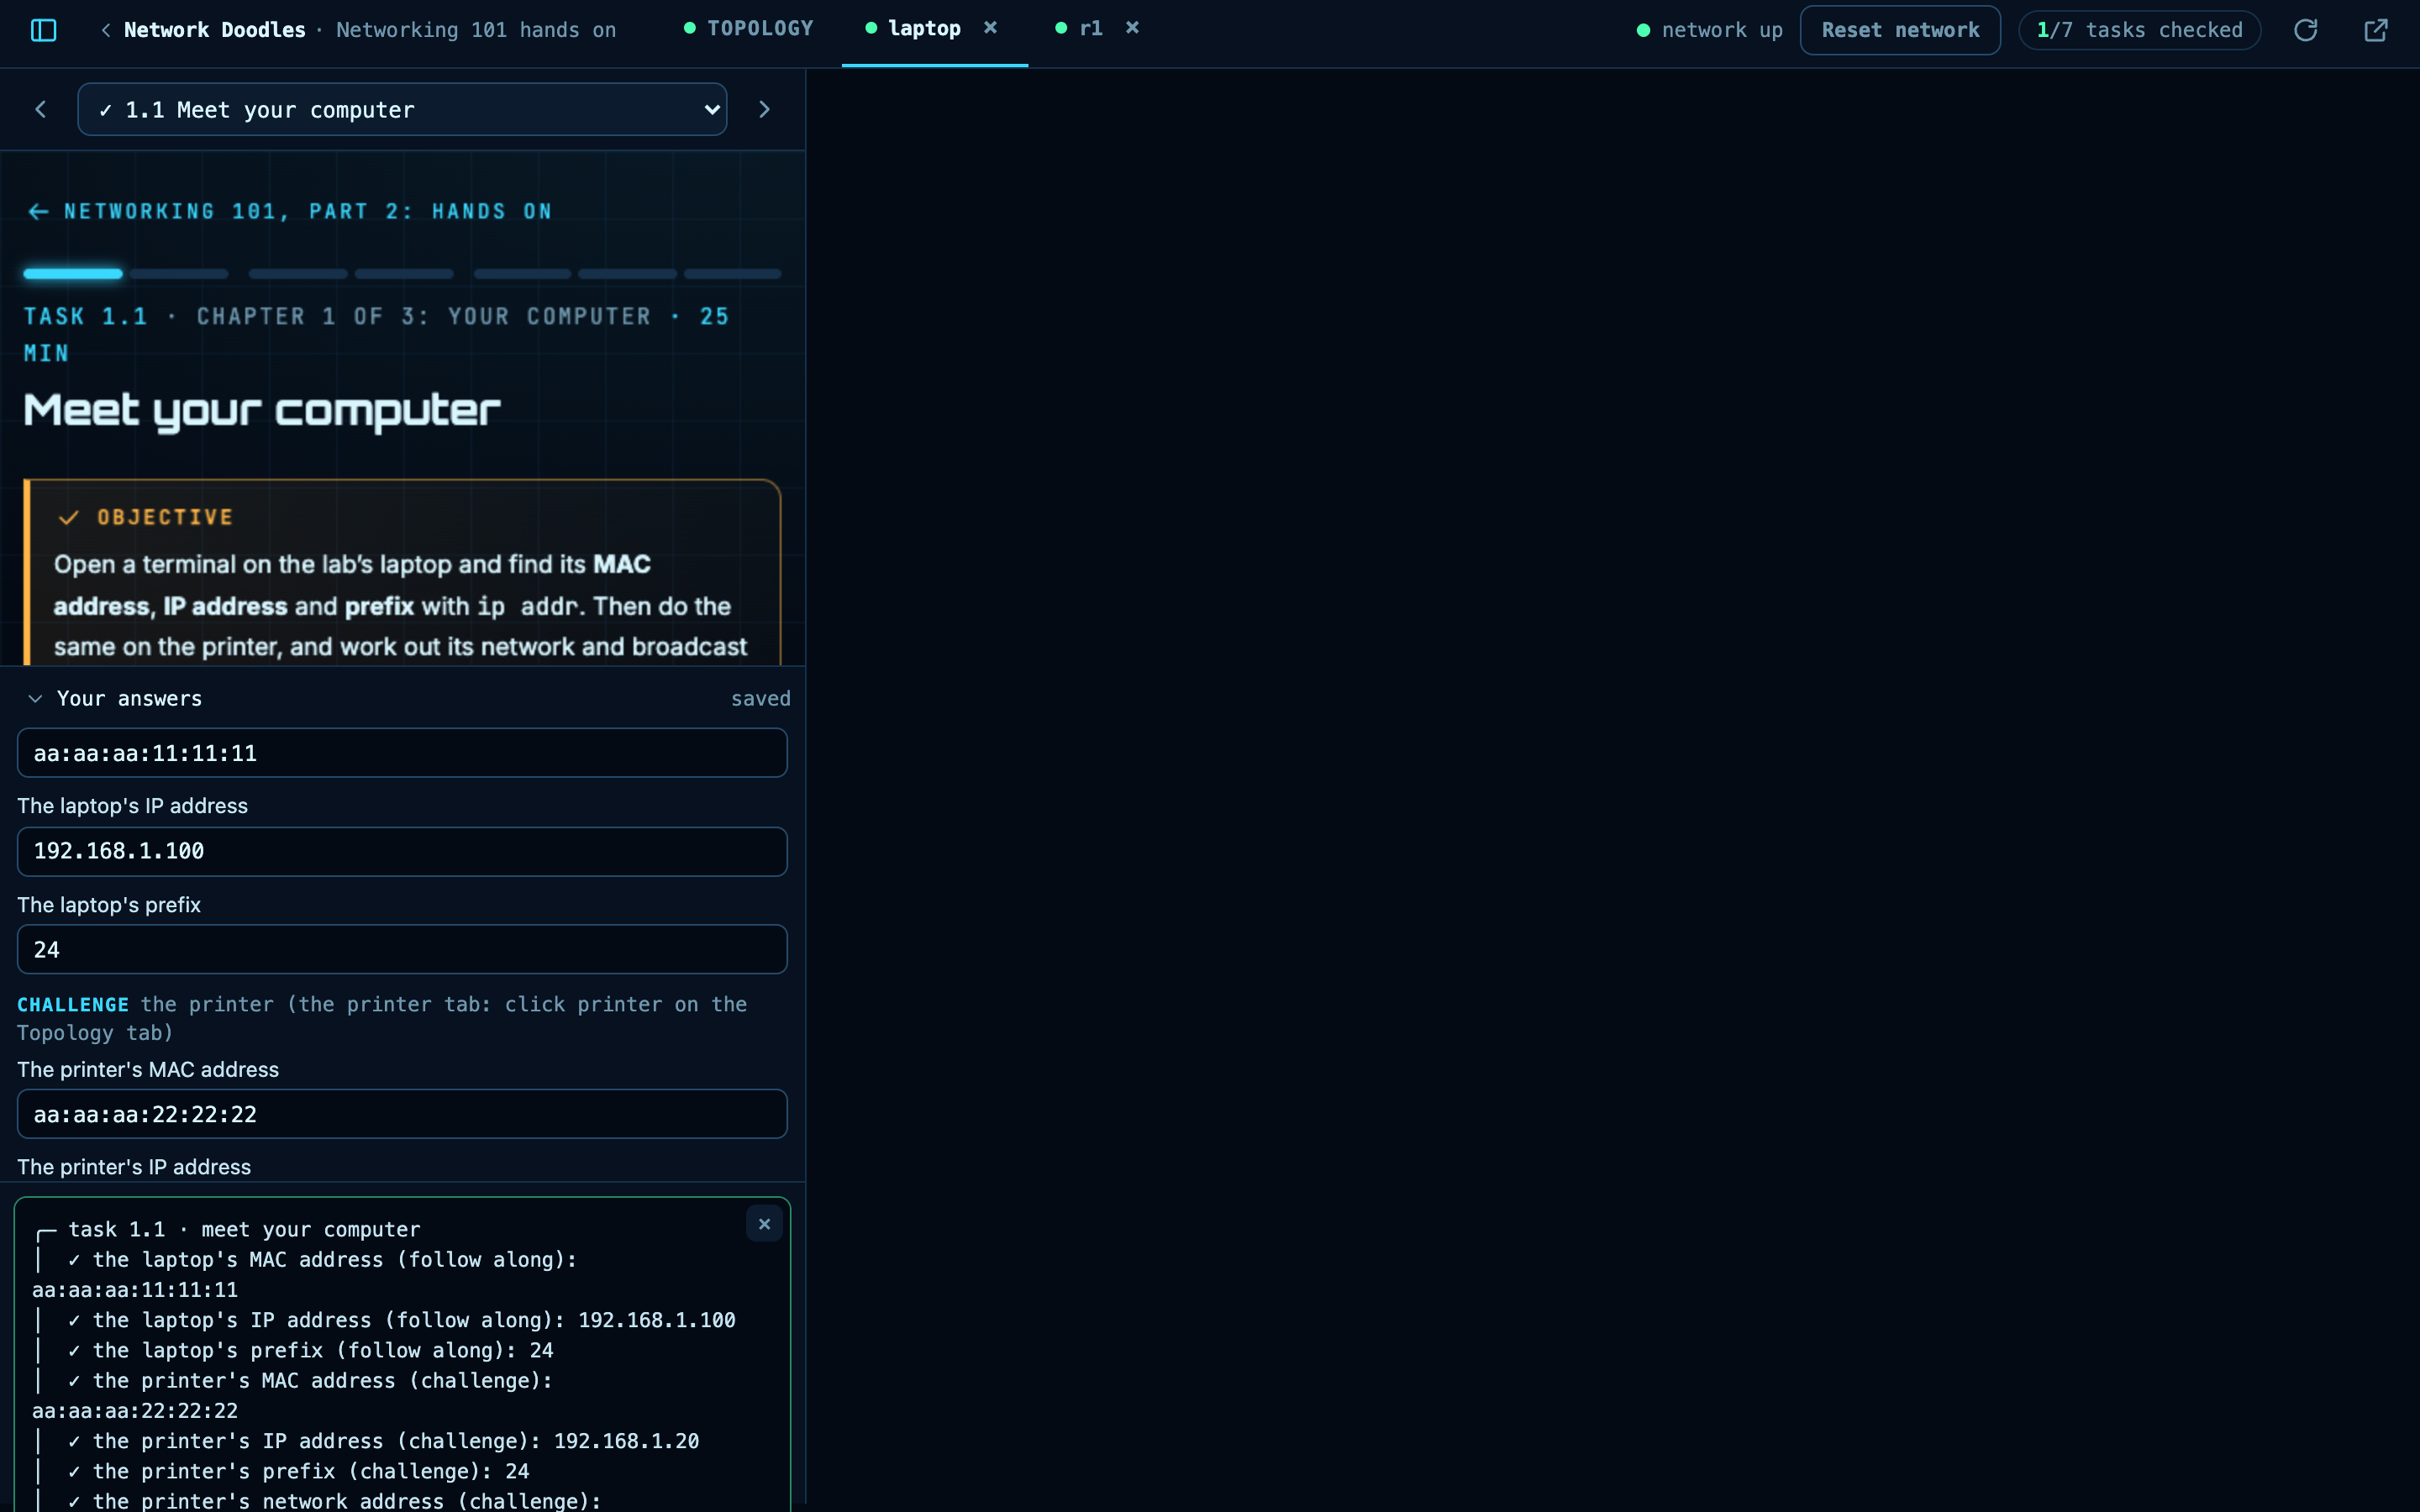
Your answers sit under the guide: a box for each question in the current task. Type an answer, then press Enter or click away and it’s saved. Check task saves them too, before it checks. Fold the box with its arrow when you want the guide back.
Check task, under the guide, runs the checker. Solve it for me, next to it, fills in the task for you. Reset network, in the top bar, puts the network back how it started (it asks first; your answers stay).
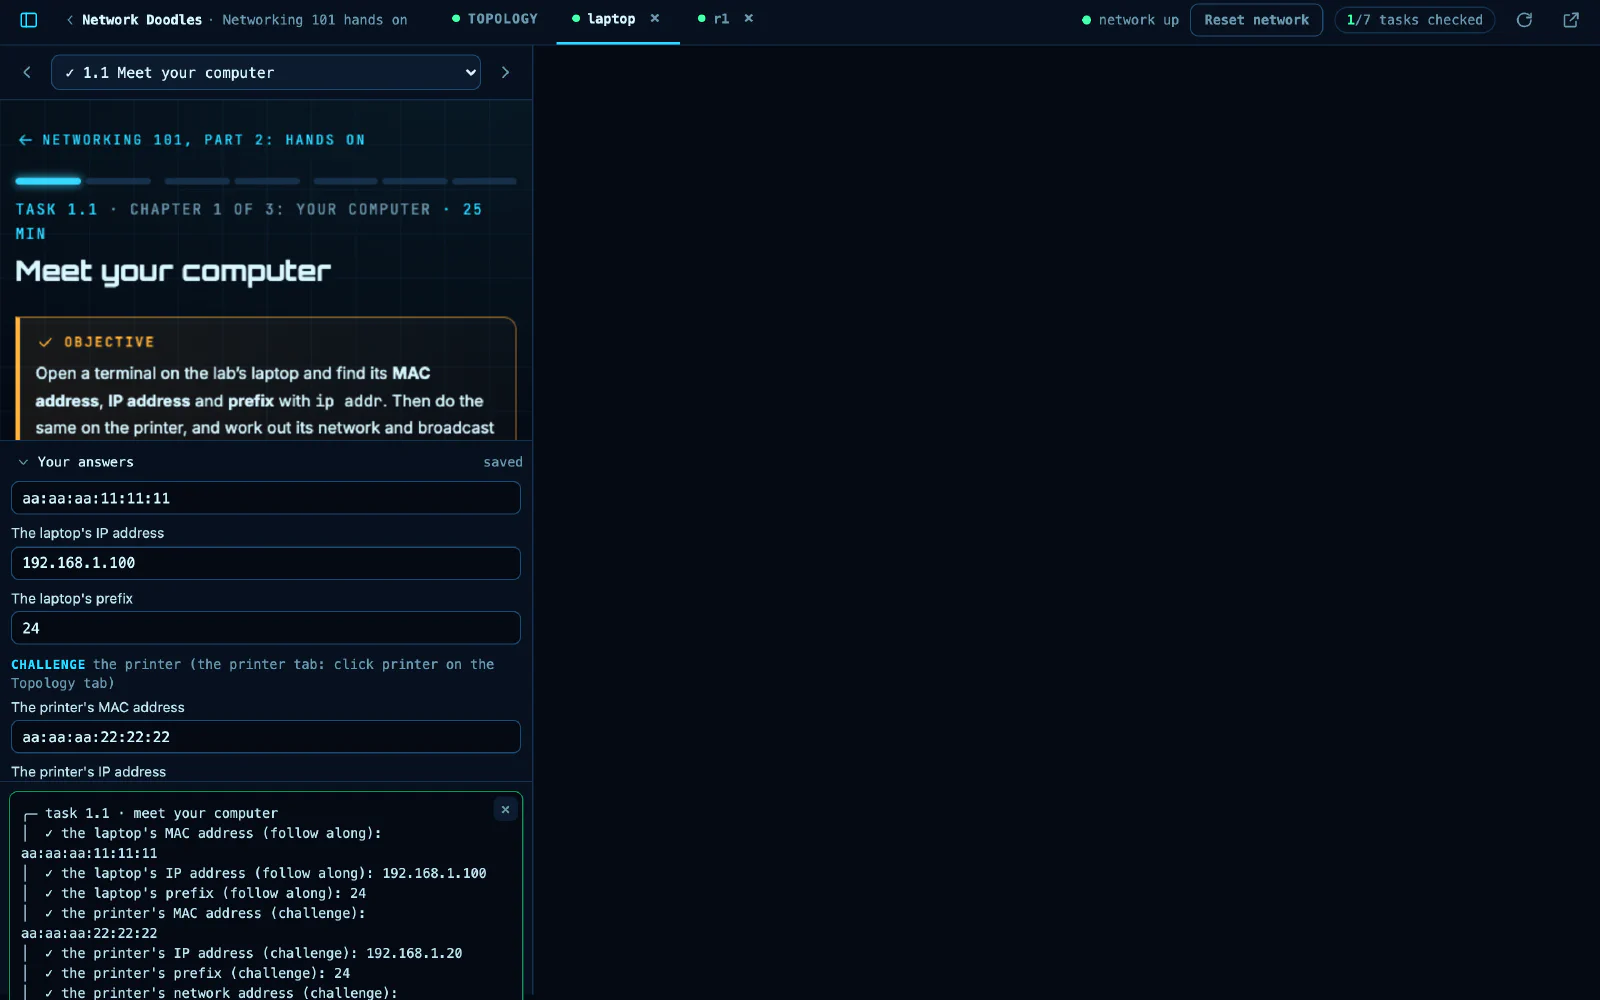
Answers in, Check task clicked: a green tick for each one. Close the result with its ×.
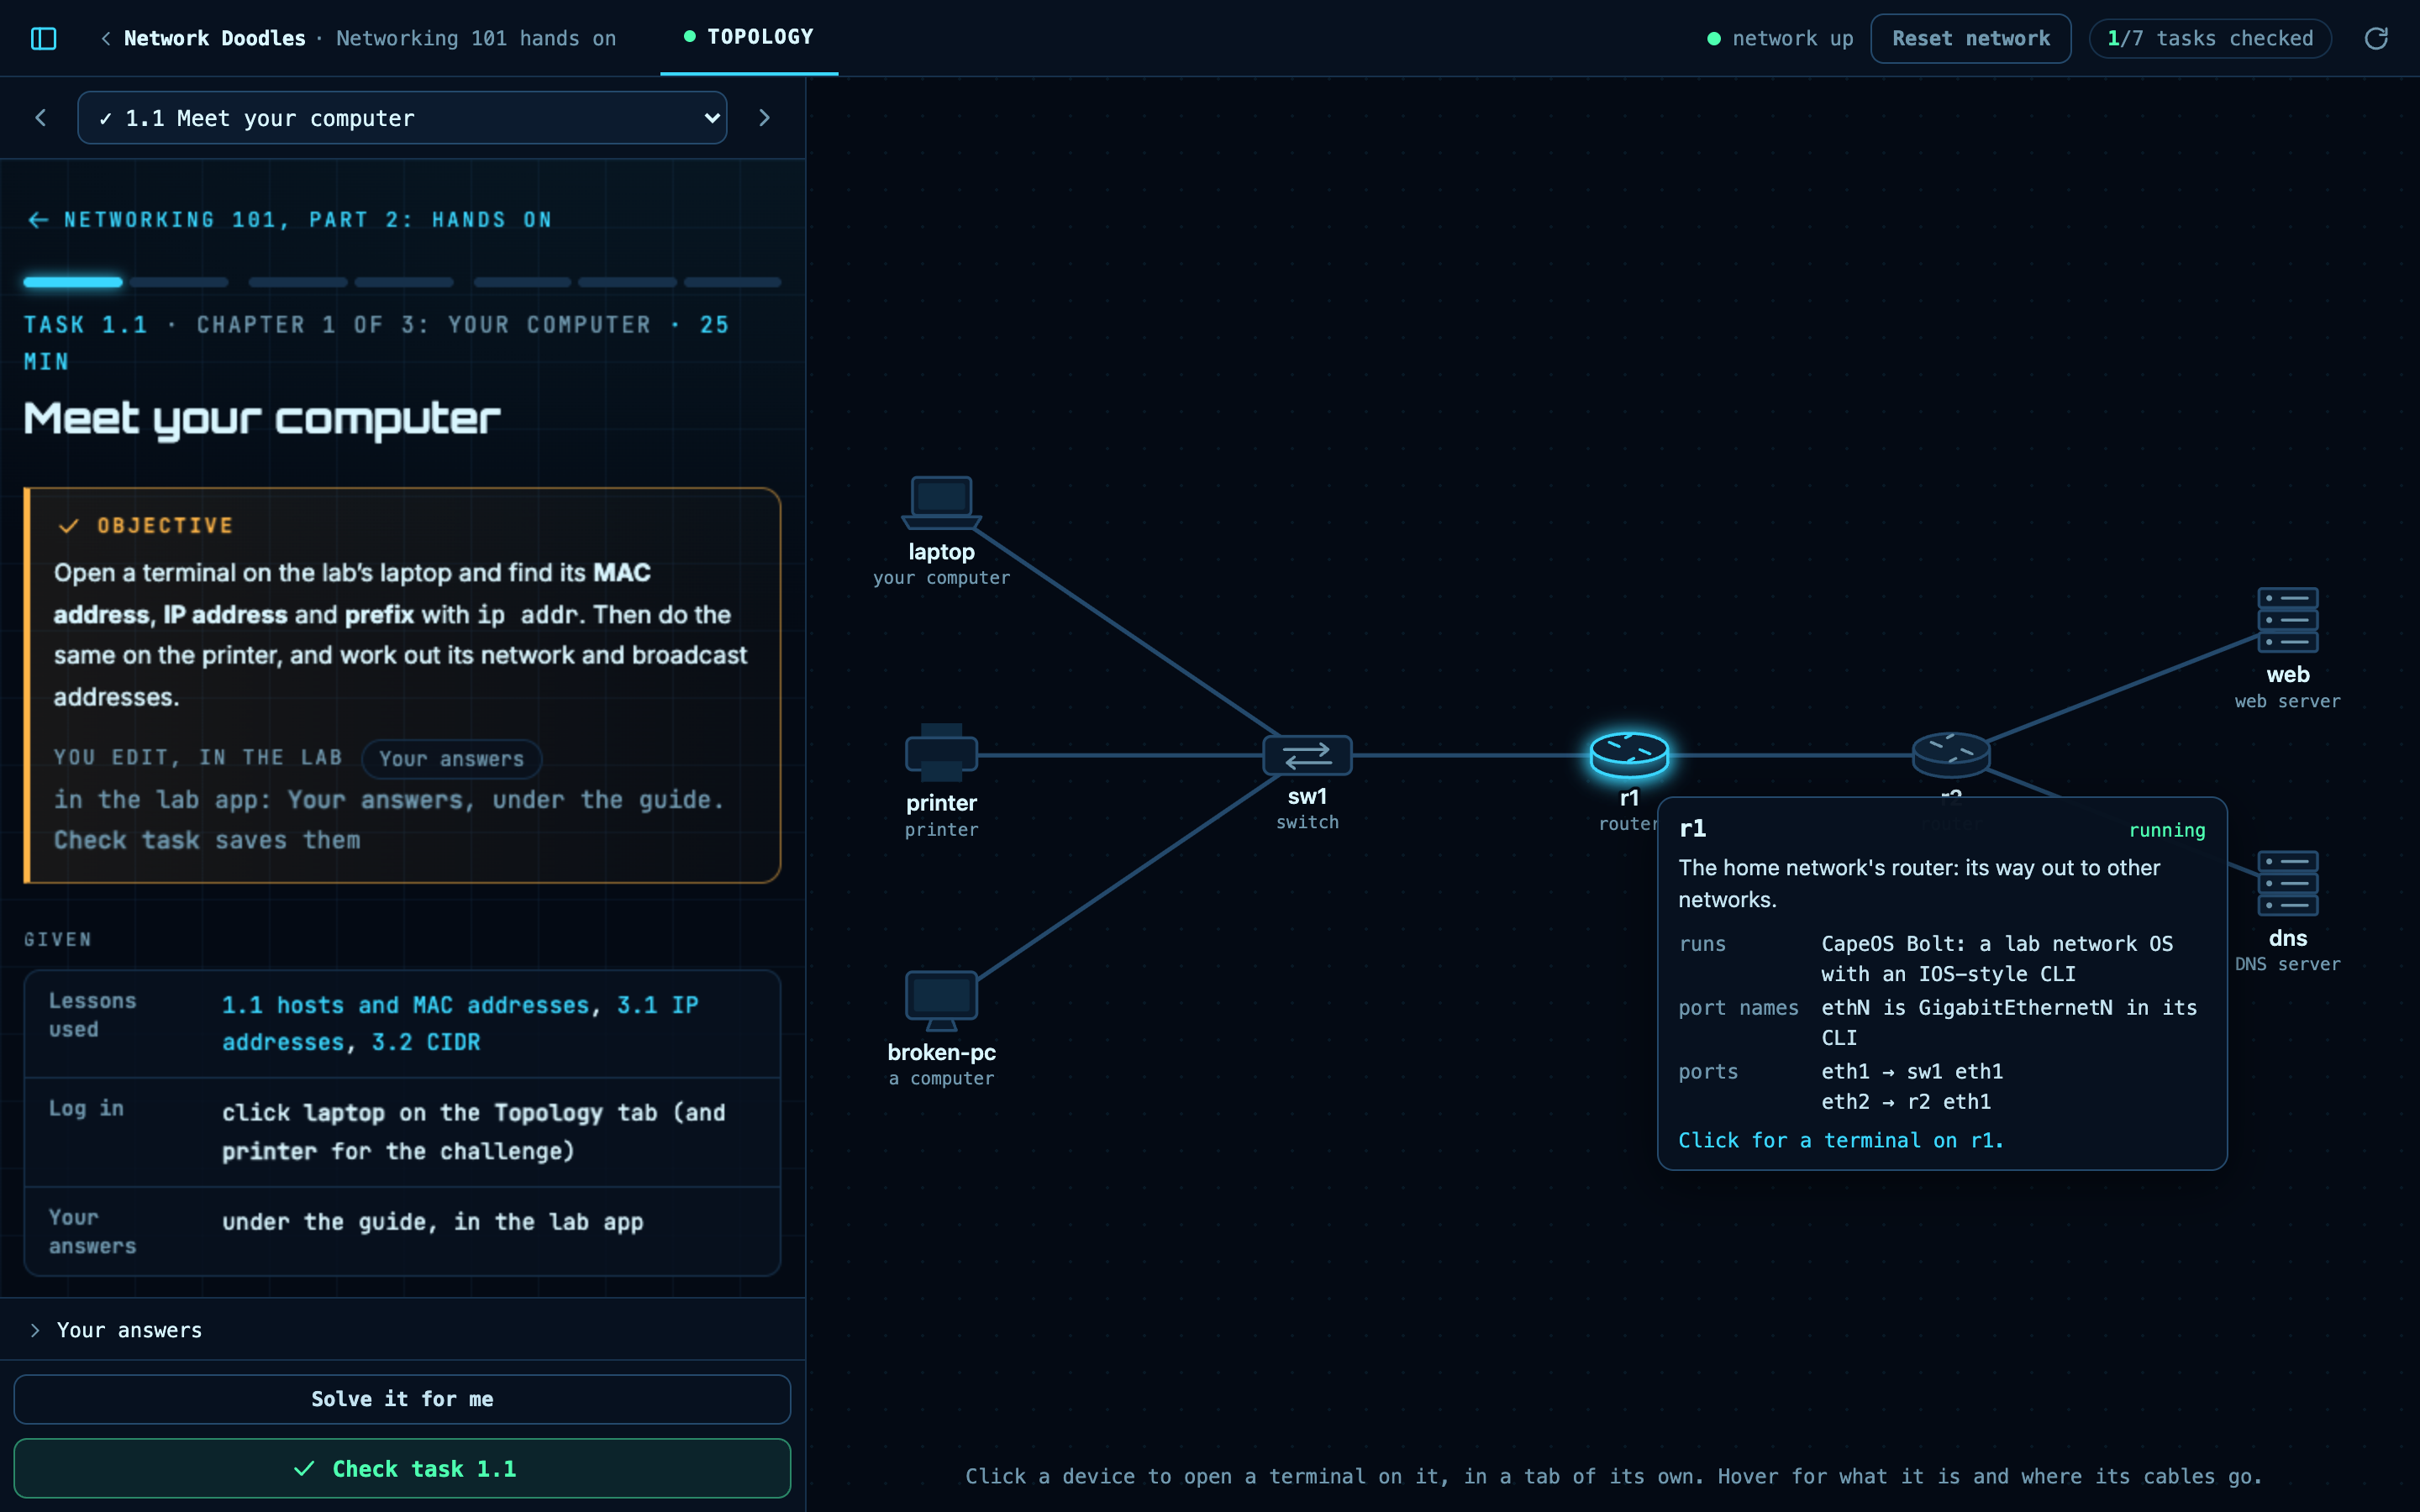
The rest of this page, from the editor to make, is for labs with a VS Code tab. In a Topology lab, the
guide’s own steps say which device tab each command goes in.
Walk away and the codespace stops itself after 20 minutes without you using the lab, so it doesn’t eat your free hours. Click Open the lab again to pick up where you were: your files are still there. Done with the lab? Finish lab, top right, deletes the codespace and everything in it, and brings you back here.
How Codespaces is paid for
It runs on your own GitHub account, not anyone else’s, and every account gets a free monthly allowance: 120 core-hours and 15 GB of storage (180 and 20 with GitHub Pro). The lab’s 4-core machine uses 4 core-hours an hour, so the allowance is about 30 hours a month. Most labs take 4 to 10 (each lab’s page says how long).
- The lab stops its codespace after 20 minutes without you using it, so a forgotten tab doesn’t eat your hours.
- A stopped codespace still uses storage. When you’ve finished the lab, click Finish lab in the lab app. If you don’t come back, the codespace is deleted for you a week after it stops. You can also see and delete it at github.com/codespaces. Want to keep your work? Commit and push first; Codespaces offers to fork the repo for you.
- Used up this month’s allowance? GitHub won’t start a codespace until it resets, unless you add a payment method and a budget (a 4-core machine costs $0.36 an hour). Or use the advanced setup: your laptop never runs out.
2 · Find your way round the editor
It’s VS Code, running in your browser, in the lab app’s VS Code tab. The screenshots on this page come from the laptop setup’s browser editor (code-server), and it’s the same editor: every menu, shortcut and extension works the same way.
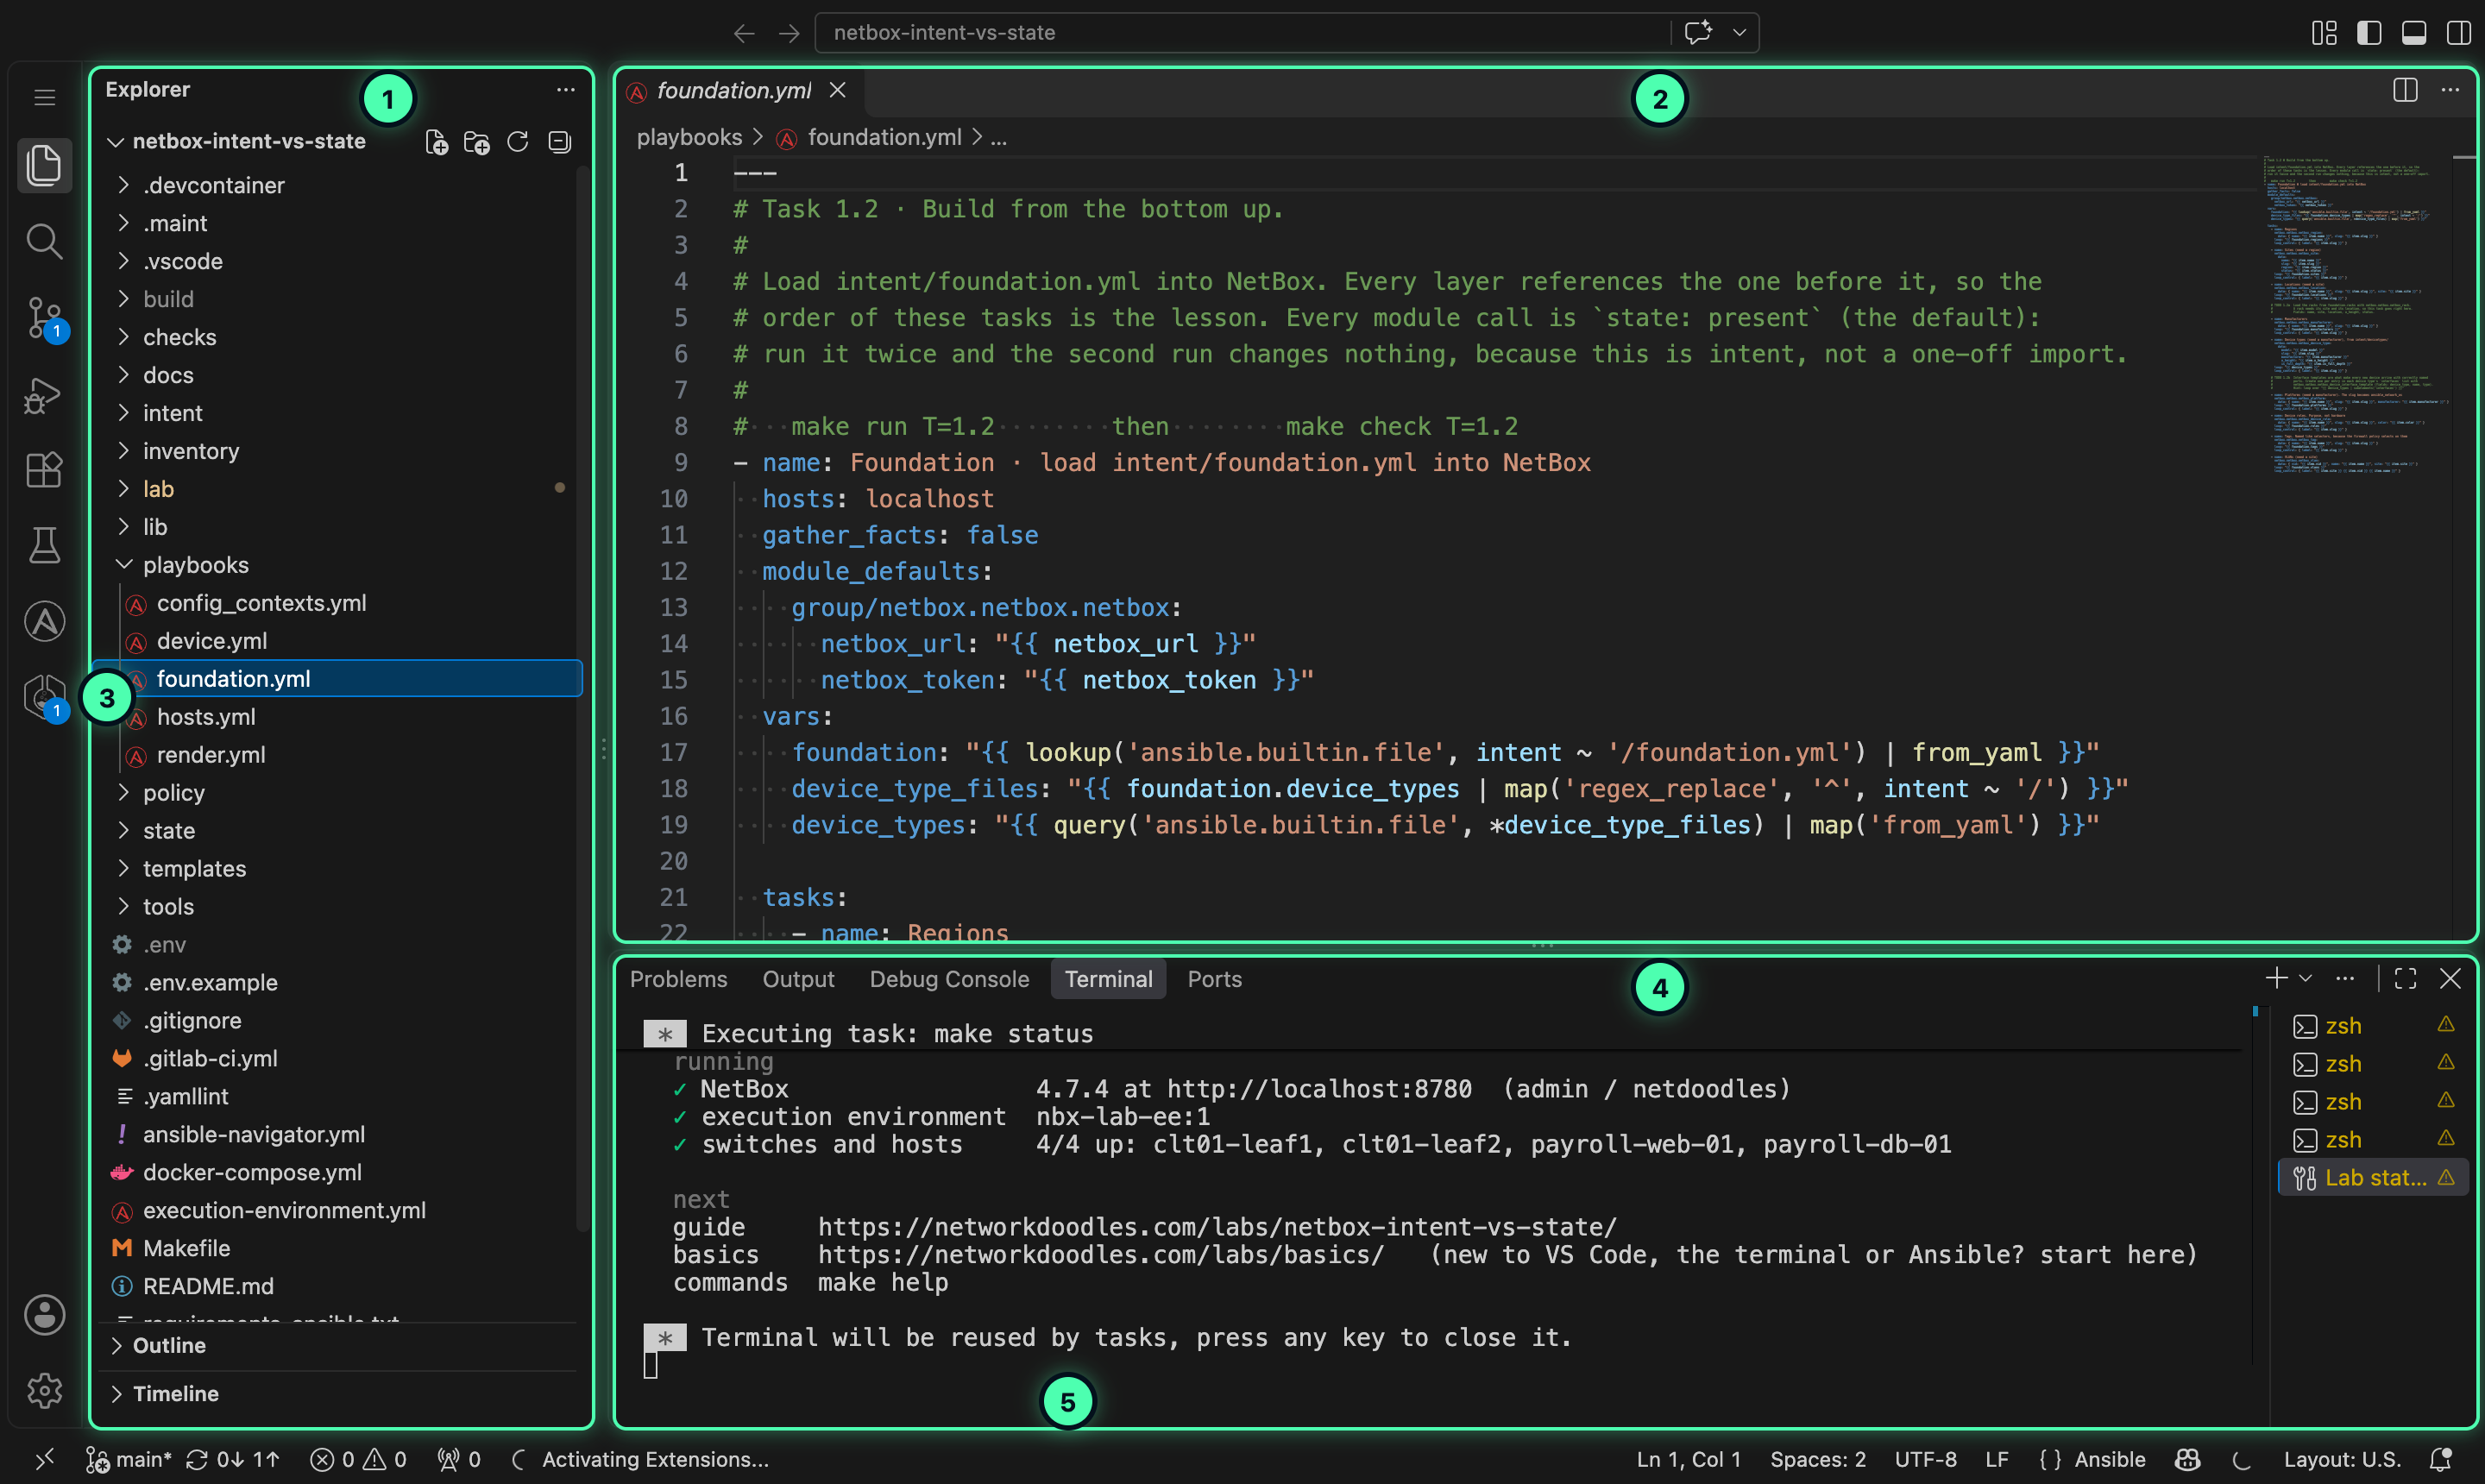
- Explorer (top icon on the left, Ctrl+Shift+E): the repo’s files. Click one to open it.
- Search (Ctrl+Shift+F): search every file. Type
TODO 1.2to find task 1.2’s gaps. - Quick open (Ctrl+P): type part of a file name, press Enter.
- Terminal (Ctrl+`, or Terminal → New Terminal): where you run commands.
- Containerlab (the flask-shaped icon on the left): the running switches and hosts.
On a Mac, Cmd replaces Ctrl. In a browser, a few shortcuts belong to the browser itself (Ctrl+W closes the tab, not the file), so when one surprises you, use the menu (☰ top left) instead.
3 · Read the lab’s status
The lab app’s top bar sums it up: network up, or how many of the network’s nodes are running so far. For
the detail, a terminal called Lab status in the VS Code tab runs make status for you. It’s the lab’s health check:
what’s installed, what’s running, and where to start. On the very first start it waits for the lab’s services,
so give it a minute.
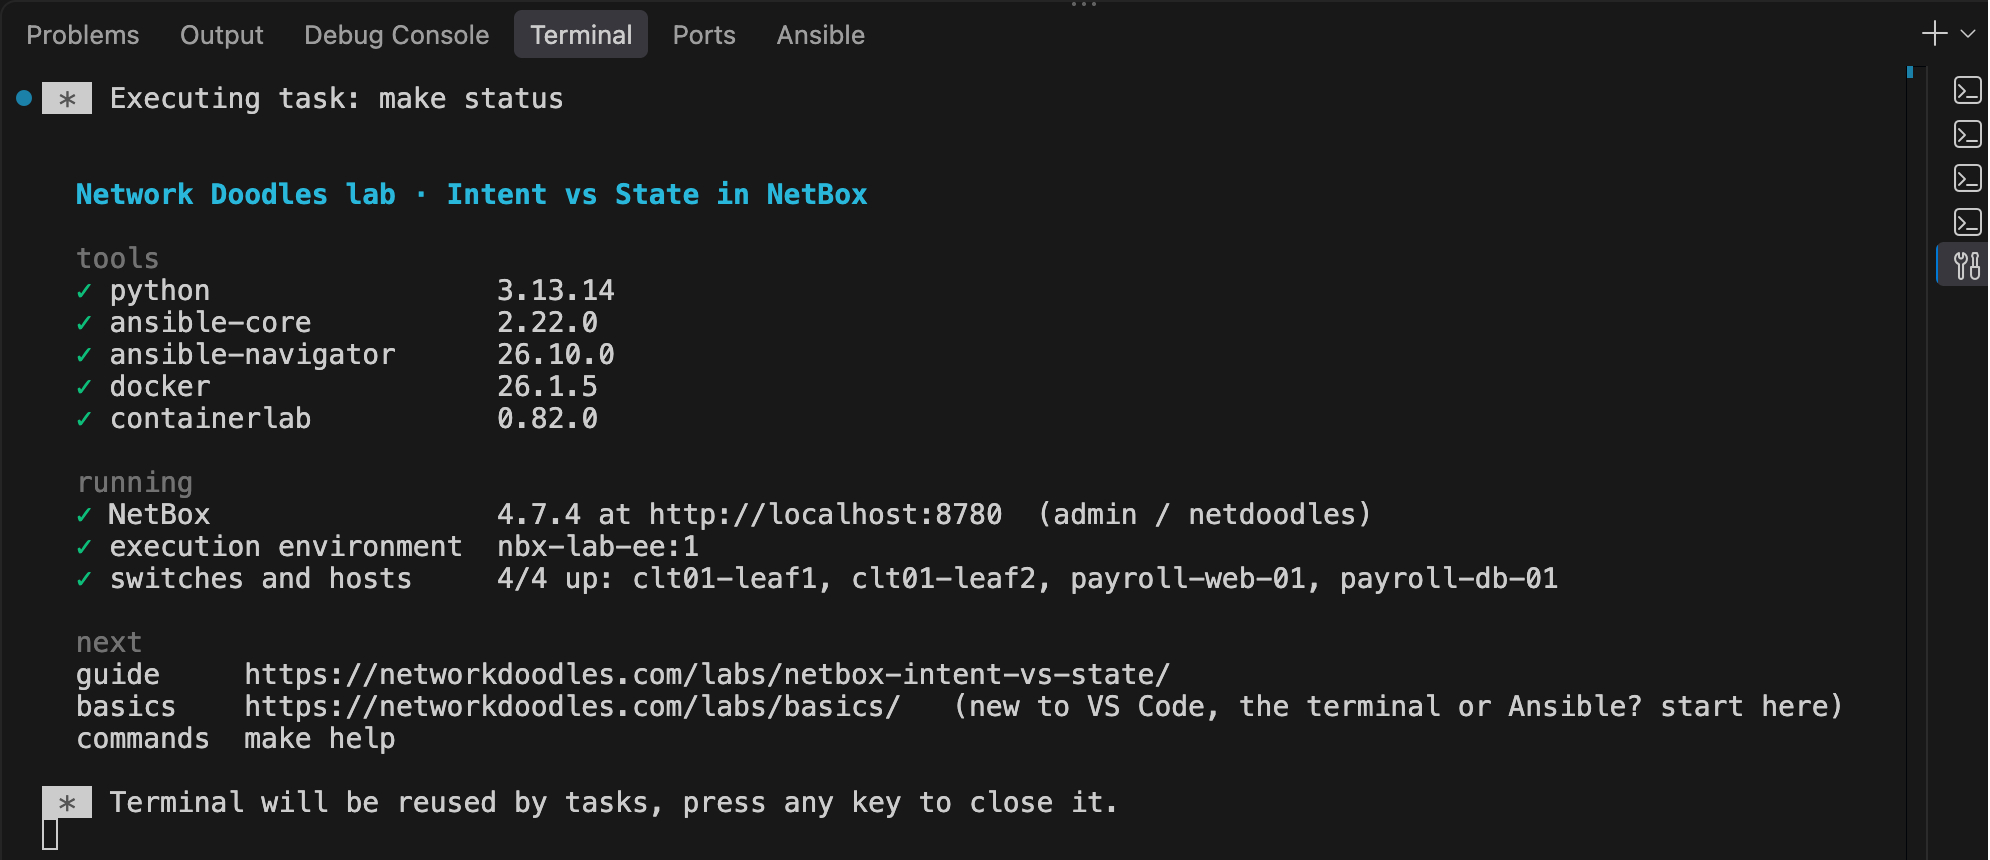
Every line should have a green ✓. A grey · is something the lab starts later, when a chapter needs it. A red
✗ tells you the command that fixes it, usually make up. Run make status again any time.
4 · Your first commands
Open a terminal (Ctrl+`). The prompt shows the folder you’re in. Type each command and press Enter:
python --version              # Python, from the lab's own venv
containerlab version          # the tool that runs the switches
docker ps                     # every container running inside the lab
make help                     # every shortcut this lab has
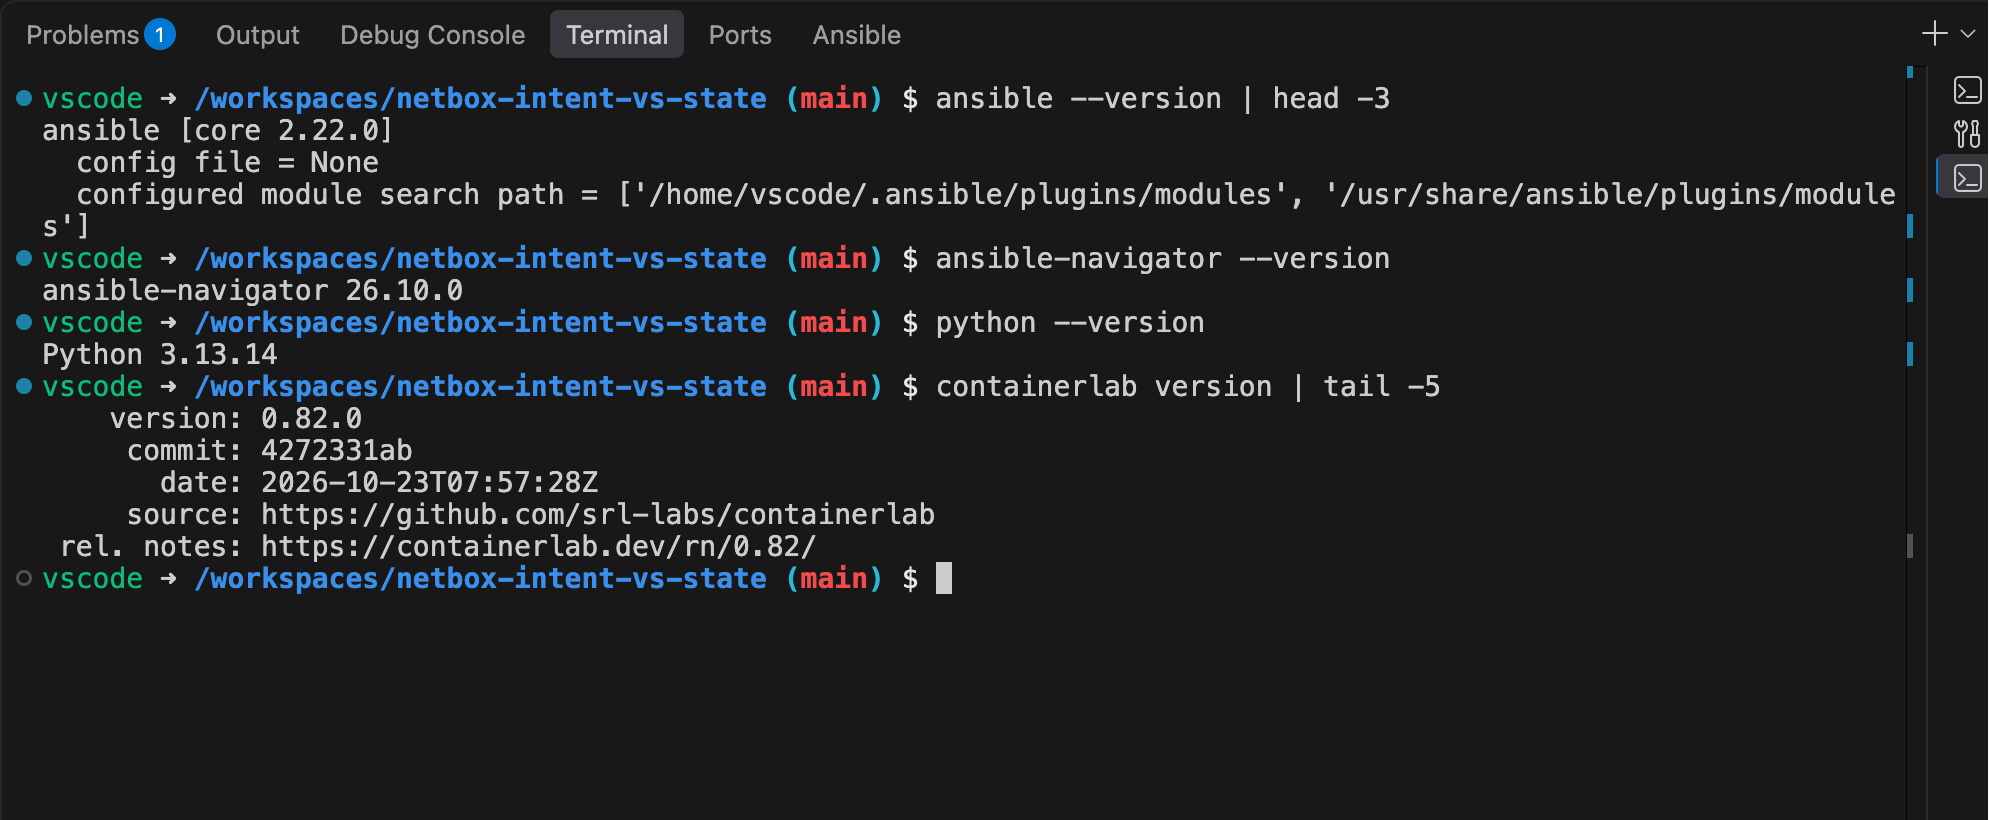
A few habits worth having from day one:
| Do this | To |
|---|---|
| ↑ | bring back the last command (keep pressing for older ones) |
| Tab | finish a file or command name for you: type make he then Tab |
| Ctrl+C | stop whatever is running |
clear | clear the screen |
pwd / ls / cd tools / cd .. | where am I / what’s here / go in / go back up |
cat README.md | print a file |
5 · Make is your remote control
You won’t type long commands in any lab. make runs them for you, and make help lists them all. These work
in every lab:
| Command | What it does |
|---|---|
make status | what’s installed and running |
make check T=1.2 | check task 1.2: your files, and the real network or service they talk to |
make check CH=2 / make check | a whole chapter / your progress across the whole lab |
make solve T=1.2 | stuck? copy in the finished files for task 1.2 |
make up / make down | start / stop everything the lab runs |
make ssh NODE=leaf1 | a command line on a switch (labs with switches) |
Most labs also have make skip CH=4: start at any chapter, with the finished files of the chapters before it.
The lab’s page says which command it uses. A lab’s own commands (make run, make deploy, make graph …) are
introduced in the task that needs them.
6 · Edit a file and save it
Each task tells you which files you edit. The gaps are marked TODO with the task number:
- Press Ctrl+Shift+F and search for
TODO 1.2. - Click a result. The file opens at that line.
- Read the comment; it says what goes there.
- Type your change, then save with Ctrl+S. An unsaved file has a ● on its tab.
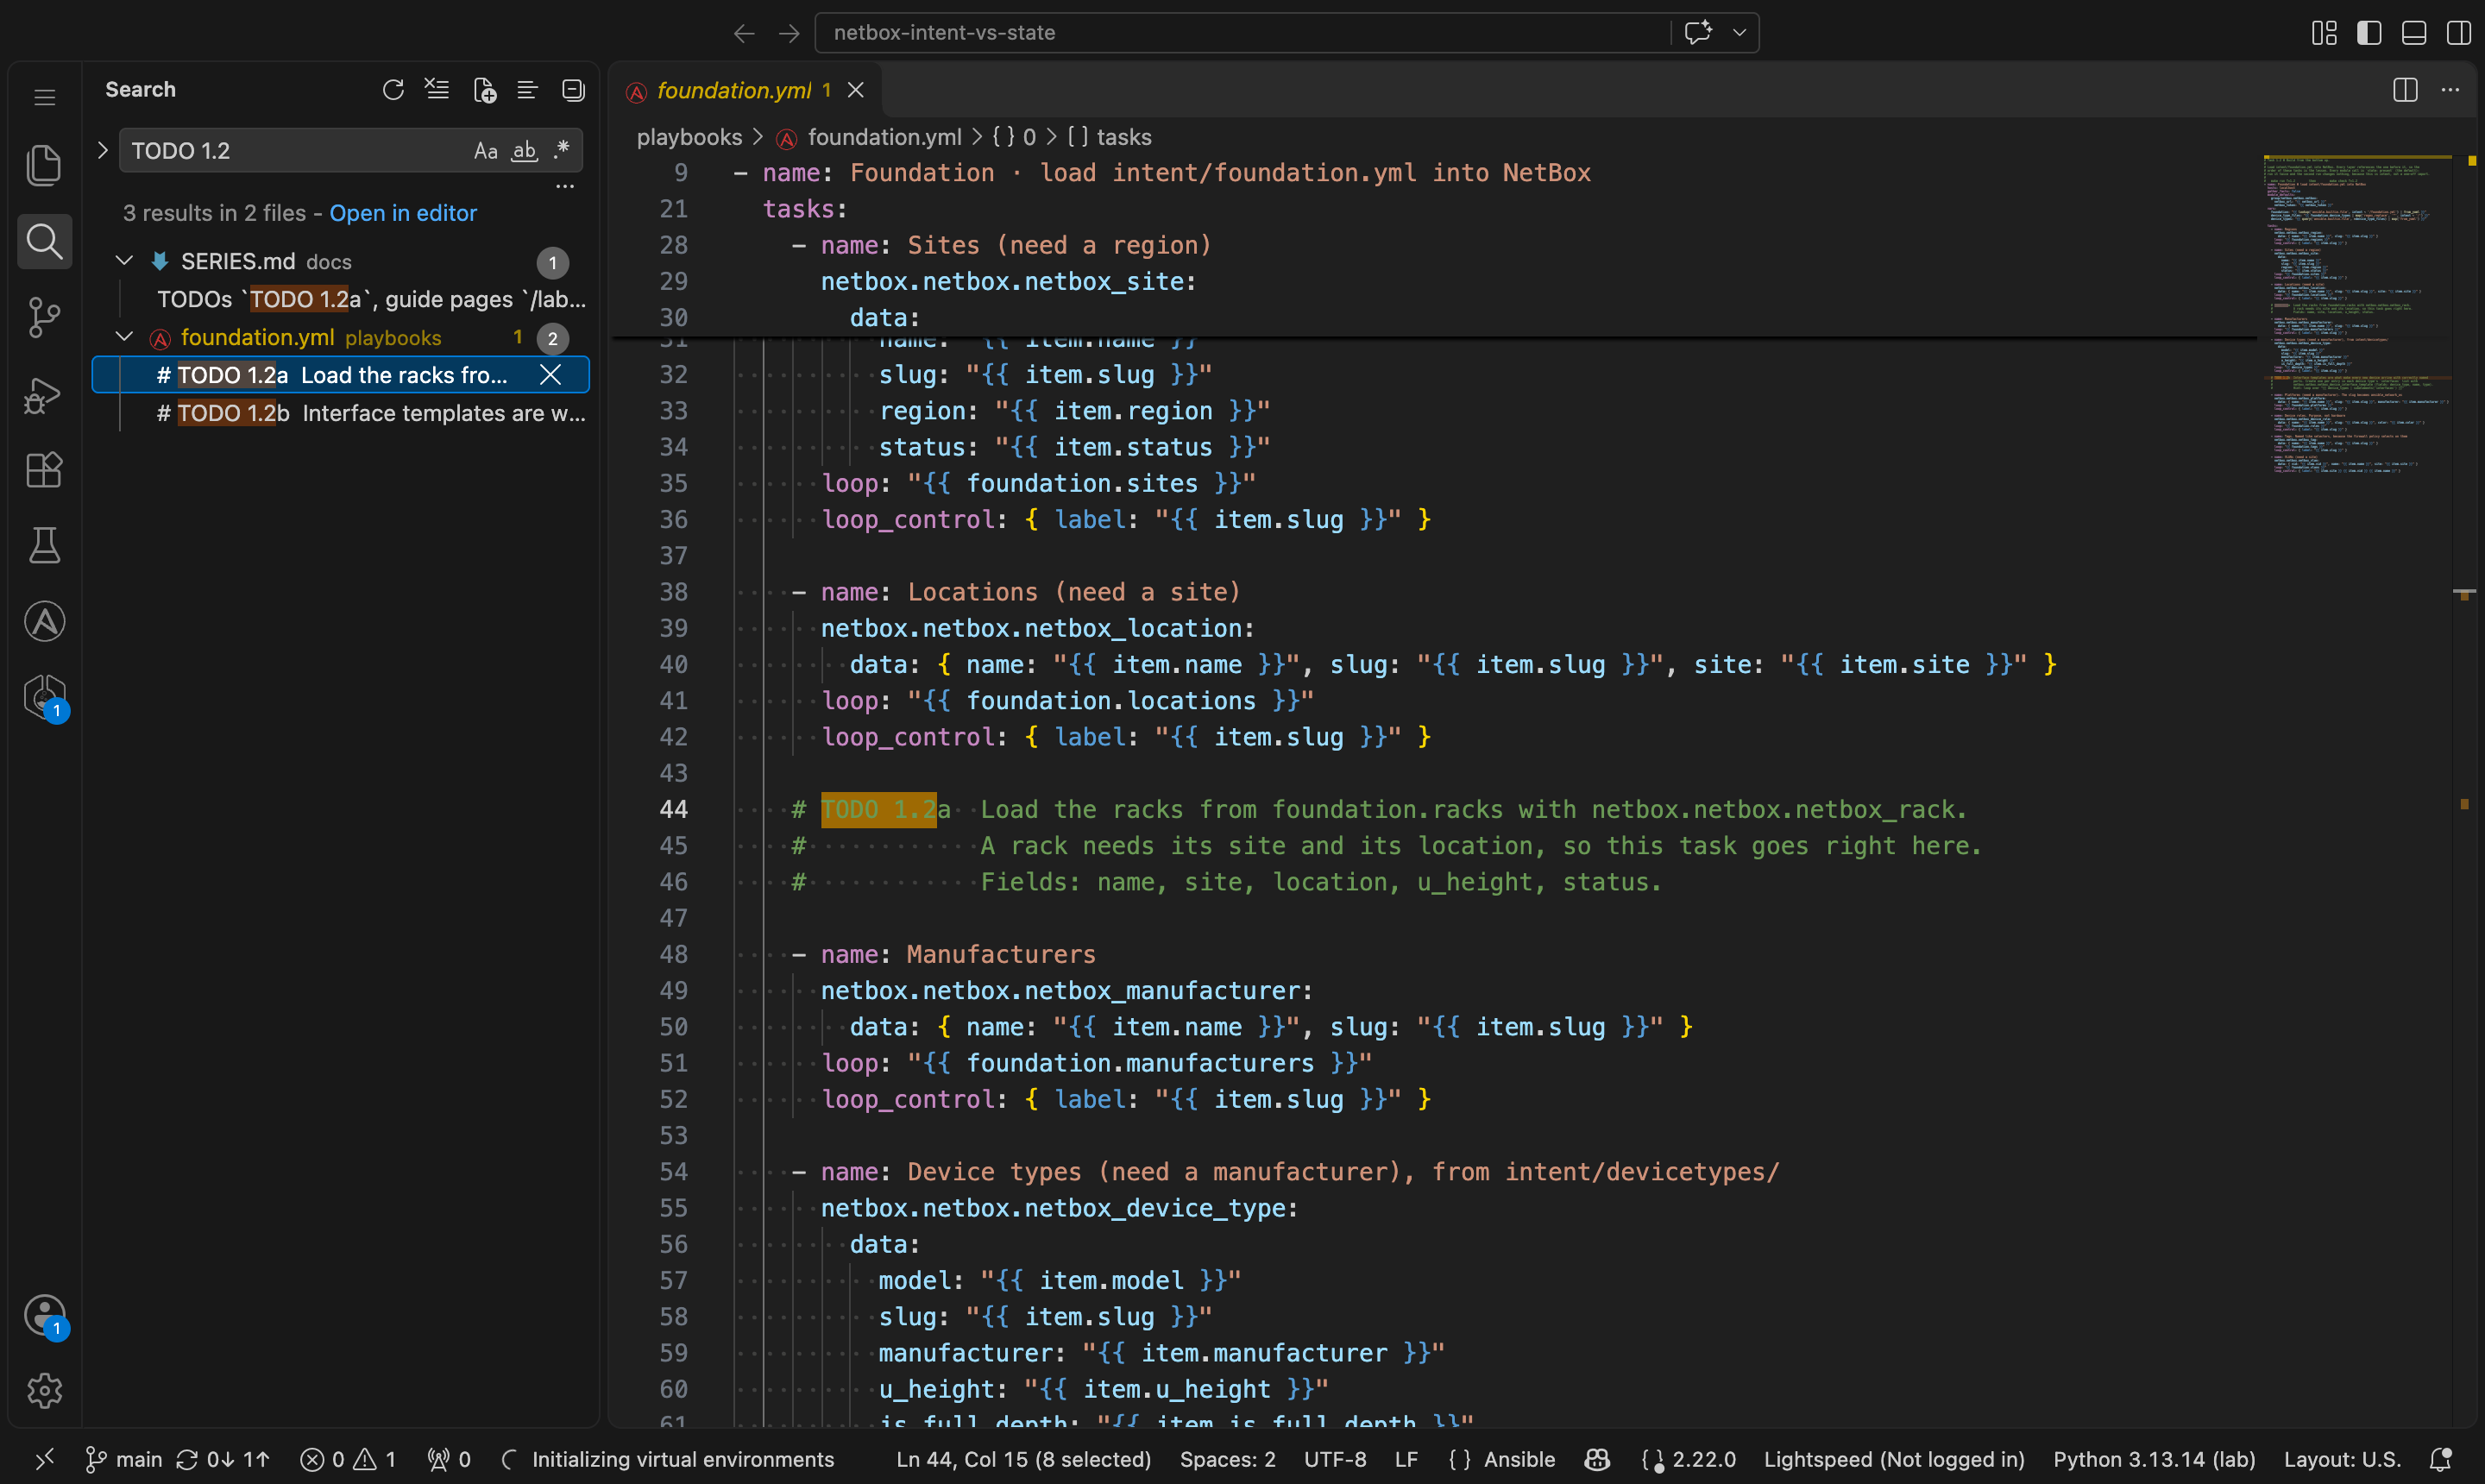
YAML is picky about spaces. Indent with 2 spaces, never tabs (the editor does this for you in .yml
files). Things at the same level line up exactly. A red squiggle means an extension has spotted a problem; hover
over it to see what. Python is the same: indentation is part of the code.
- name: Racks                       # a task: a name...
  netbox.netbox.netbox_rack:        # ...the module it runs (2 spaces in)
    data:                           # the module's options (4 spaces in)
      name: "{{ item.name }}"       # {{ item }} is the current loop item
  loop: "{{ foundation.racks }}"    # run once per rack (lines up with the module)
7 · Run it, then prove it
Each task page says what to run under run it: a playbook, a script, a test suite. Read what it prints. An
Ansible run ends in a PLAY RECAP (failed=0 is what you want; scroll up to the first red fatal: line if it
isn’t). A Python tool or pytest run ends with what passed and what didn’t.
Then let the checker decide: click Check task under the guide, or run:
make check T=1.2
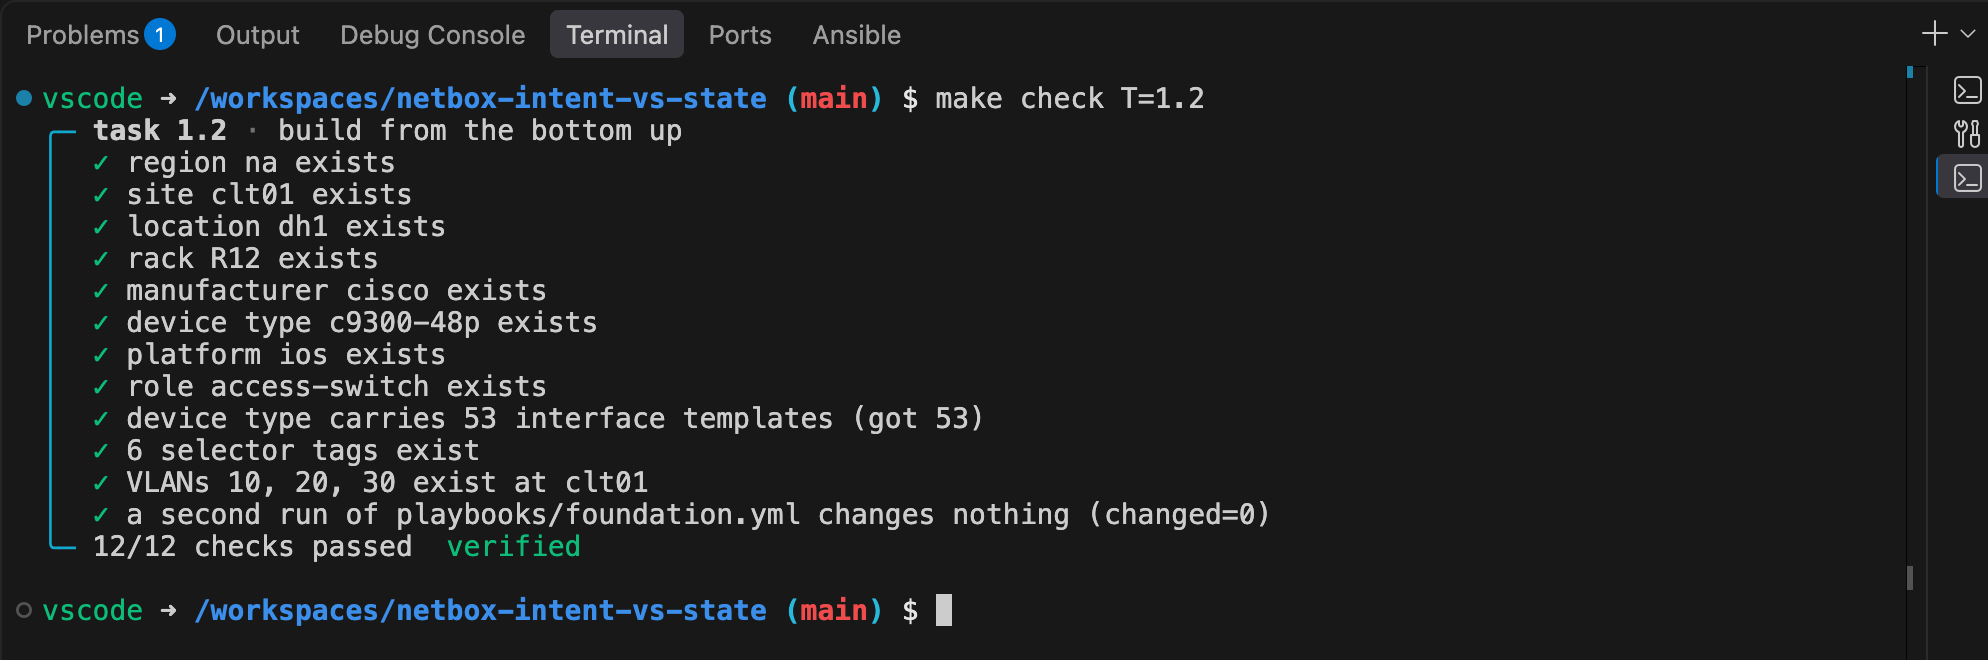
Green ✓ is done. A red ✗ says exactly what it expected and what it found (often with (got ...) at the end).
Fix that one thing and check again. The checker also tries your work on cases it hasn’t seen, so code that only
works on the example won’t pass. When it’s all green, tick mark verified on the task page to track your
progress (the lab app keeps count too, top right).
8 · Meet the switches
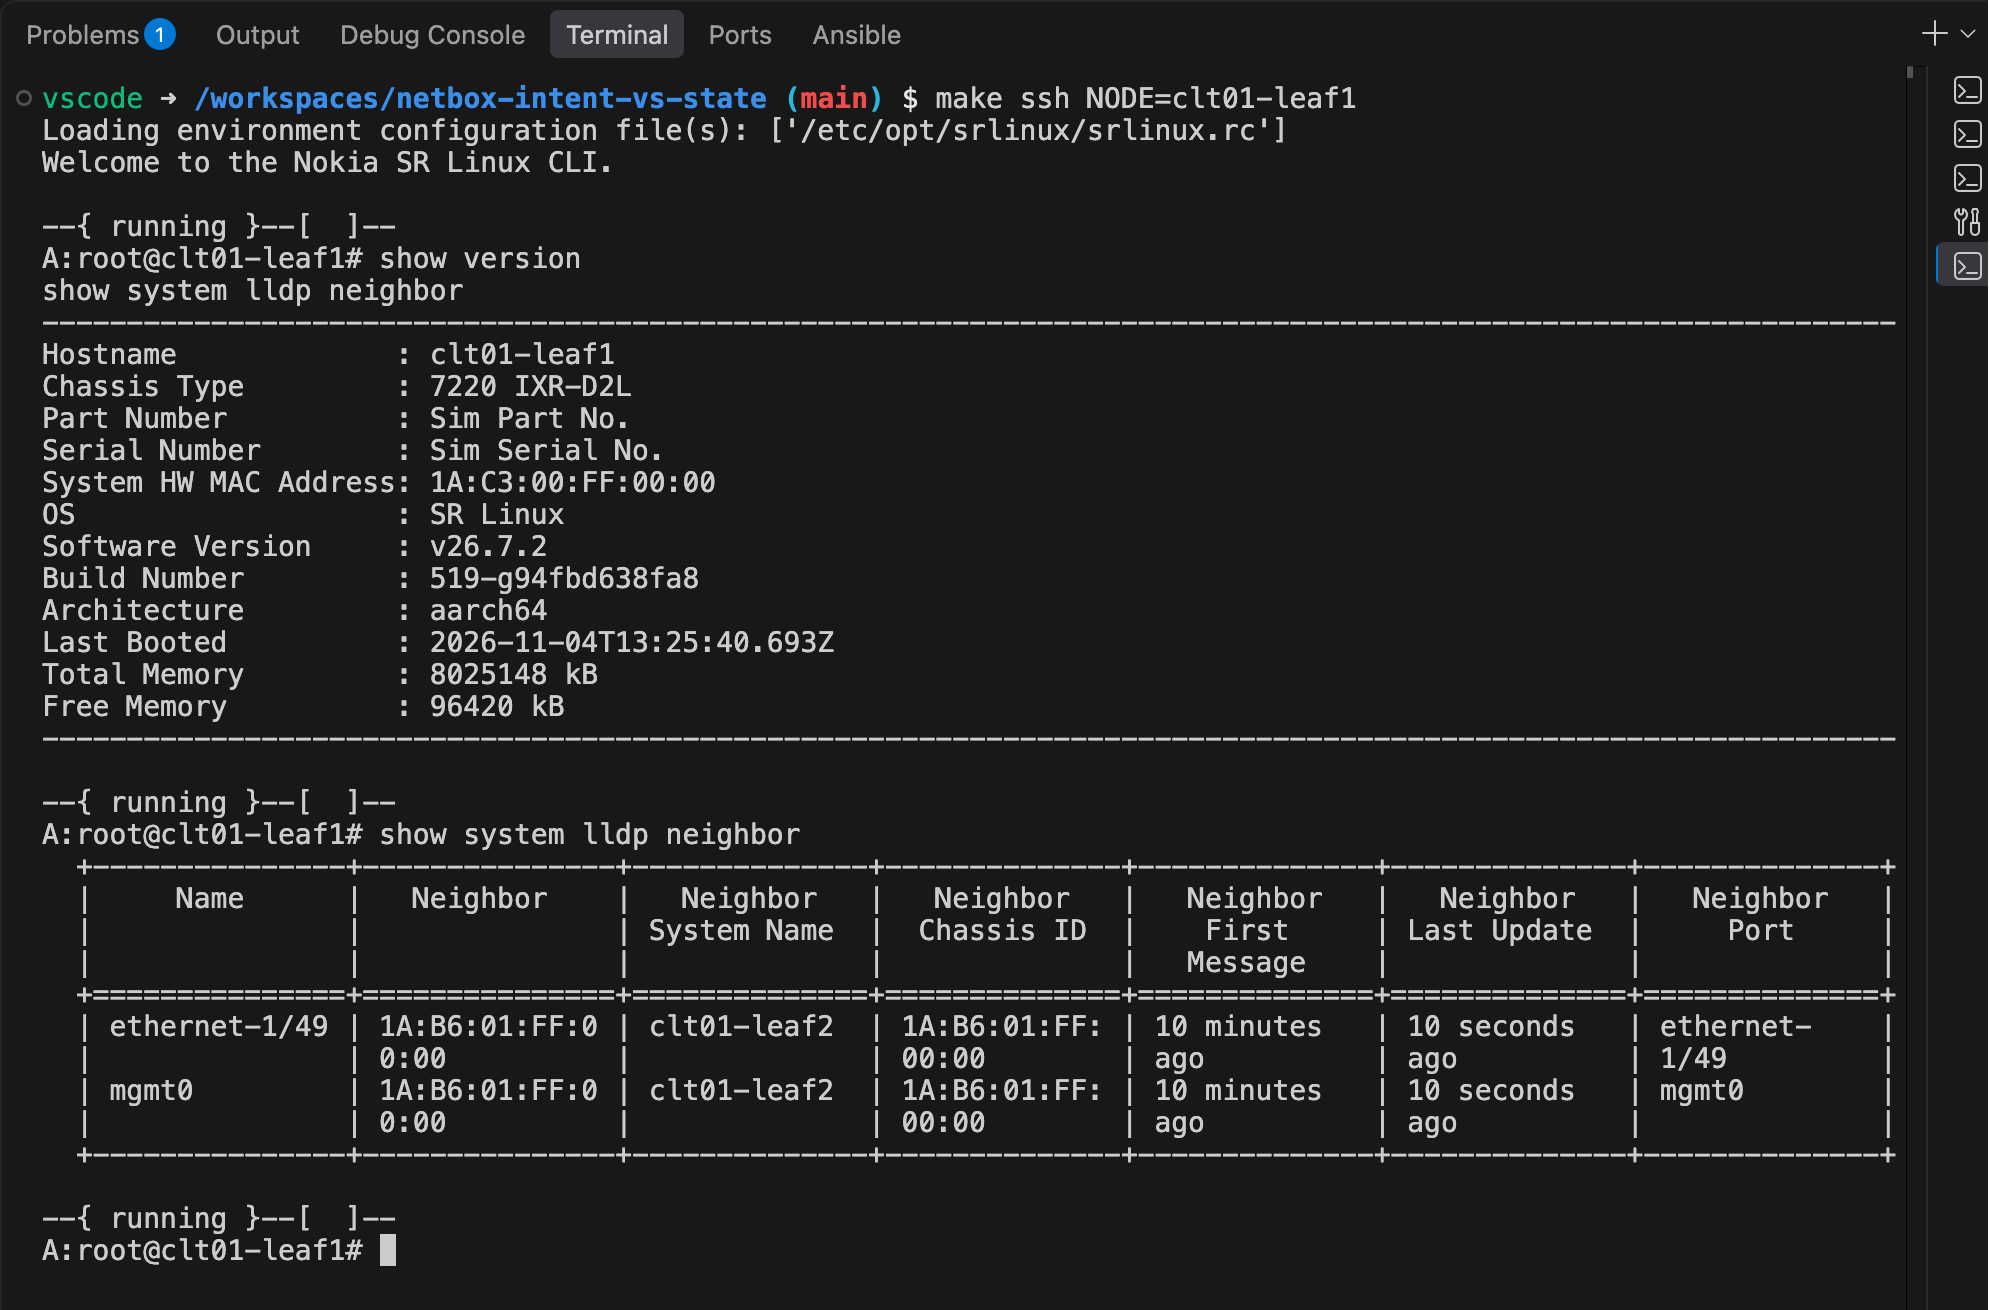
Most labs come with switches, run by containerlab inside the lab: Nokia SR Linux or CapeOS, a lab network
OS with the classic show running-config command line. Each lab’s first task says which, and how they’re wired.
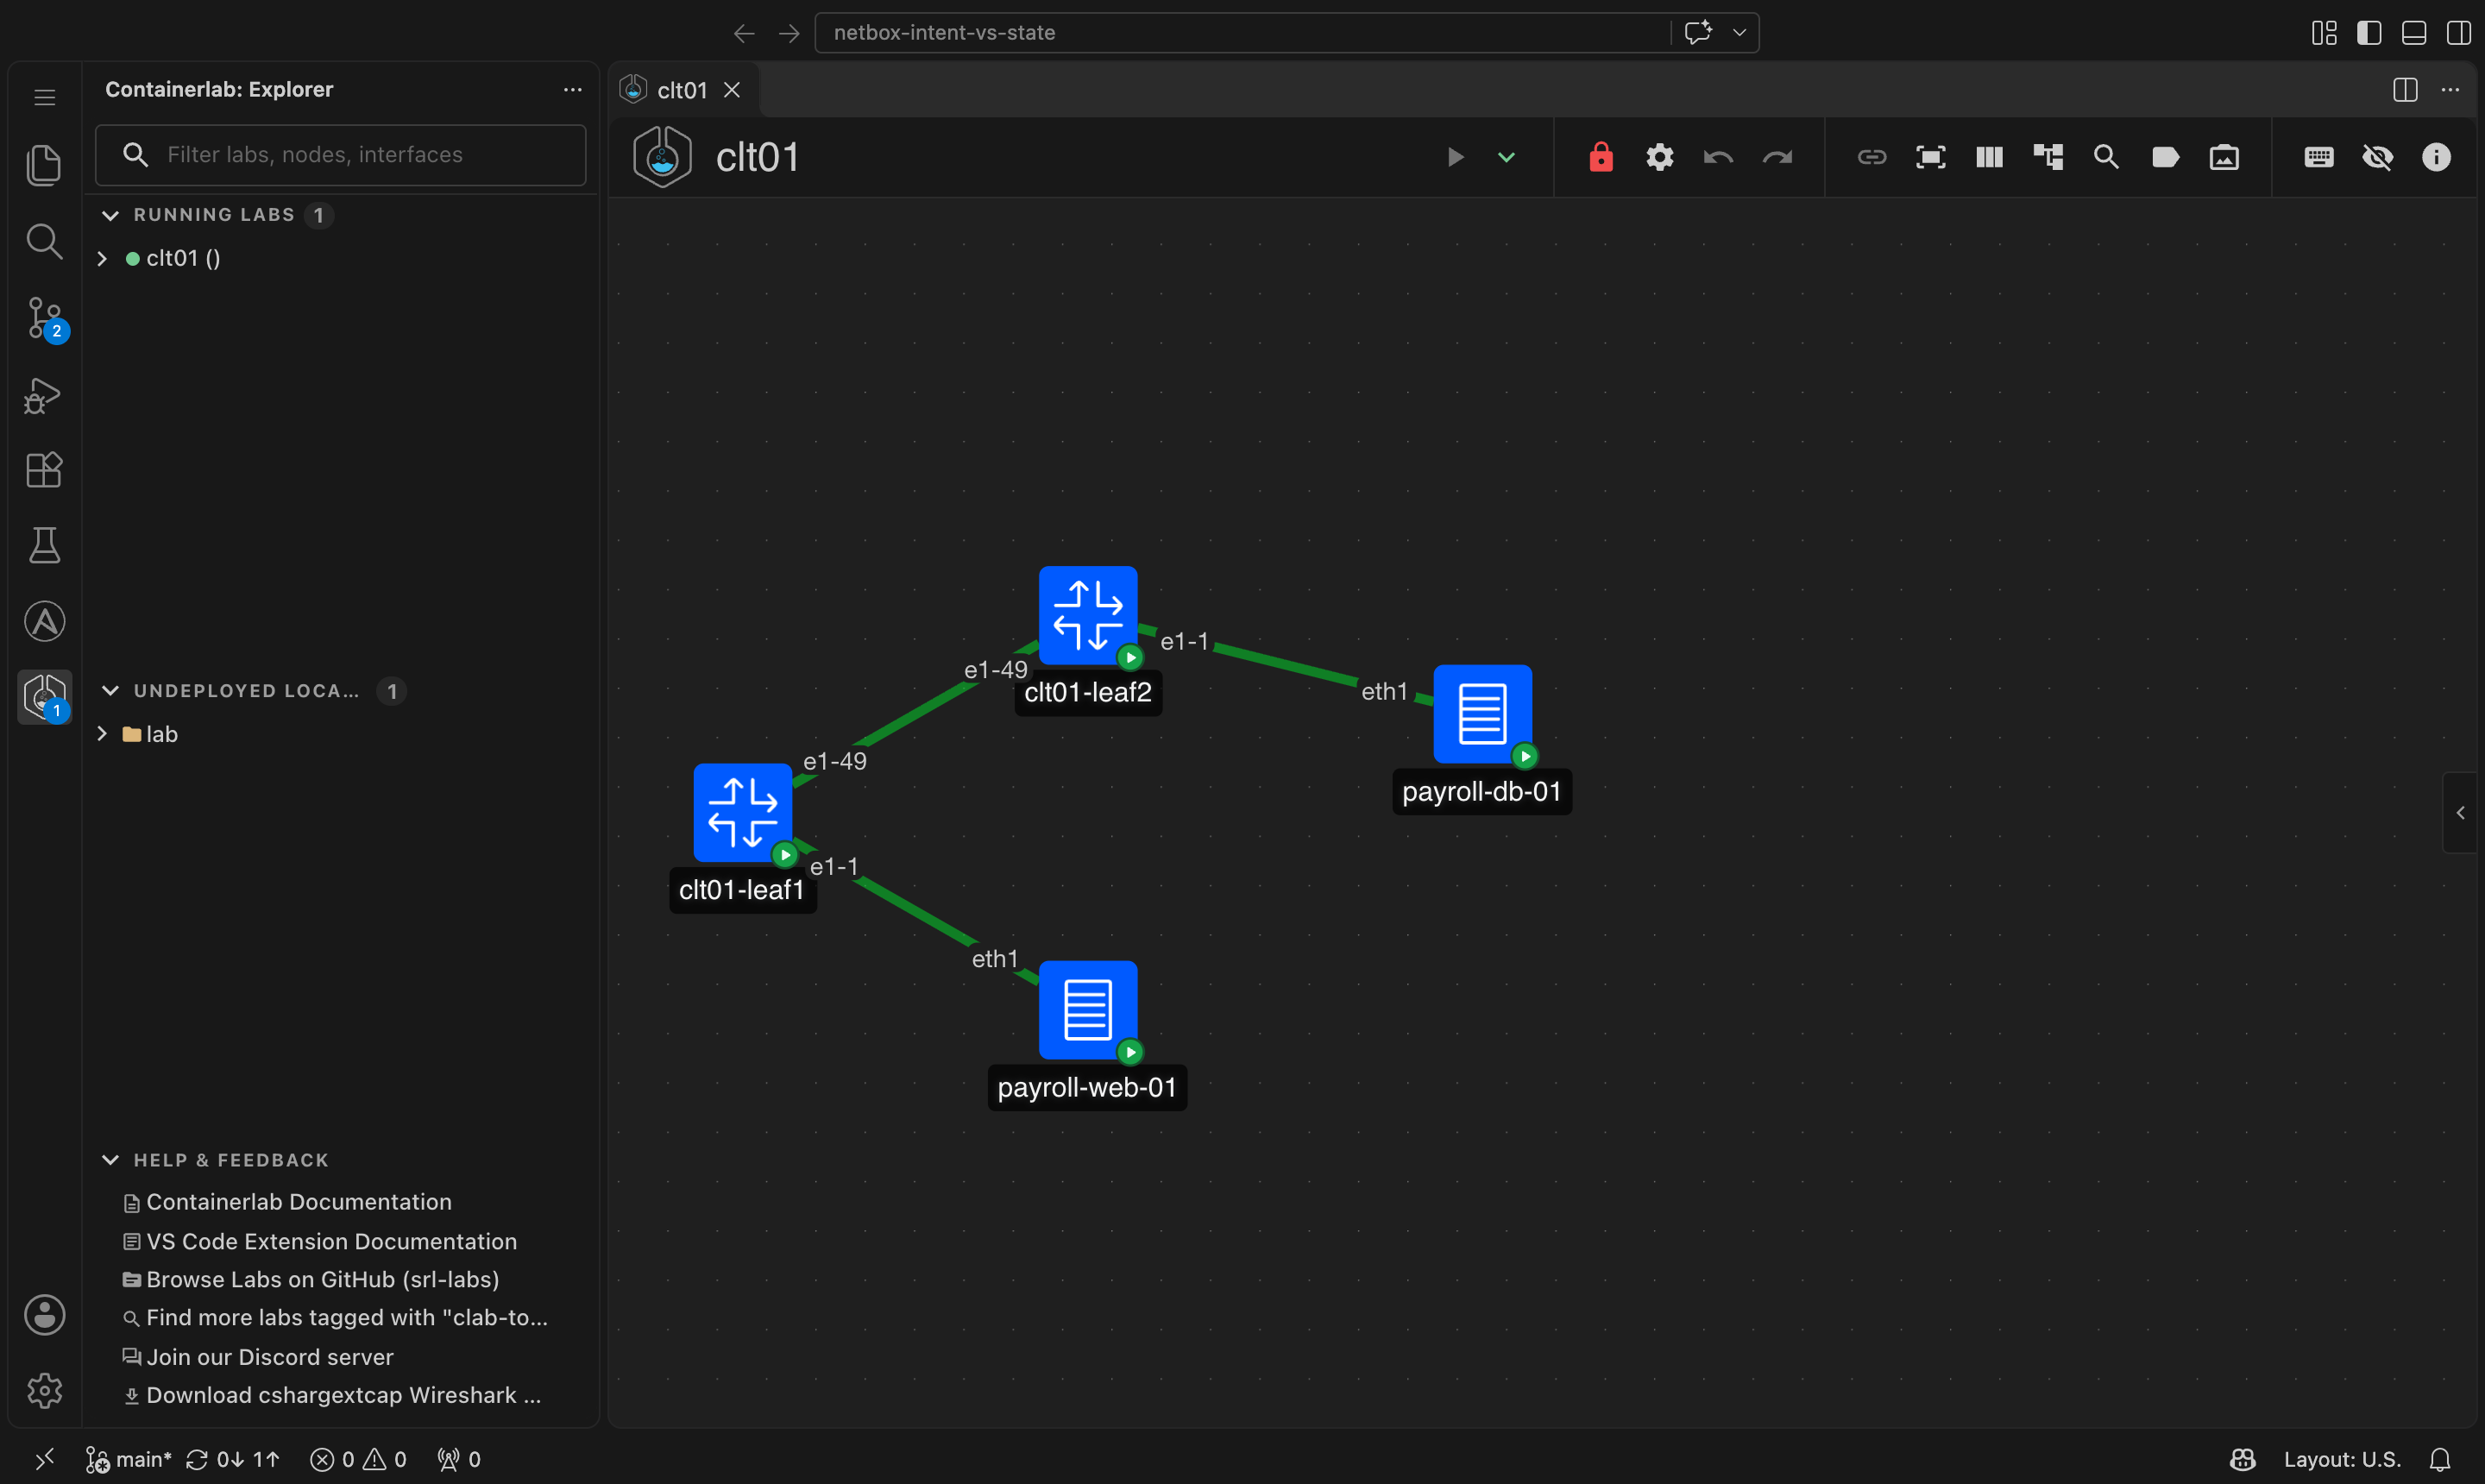
Log in to one from the terminal (the names are on the lab’s first task):
make ssh NODE=leaf1
Then try show version, and quit or exit to come back. You can also right-click a node in the containerlab
panel and choose Connect (SSH). Broke one? make up rebuilds the switches from the lab’s files.
9 · Git, just enough
The repo is a Git repository, so you can always see what you changed and undo it:
git status                       # which files you changed
git diff                         # exactly what changed, line by line
git restore <file>               # throw away your changes to one file
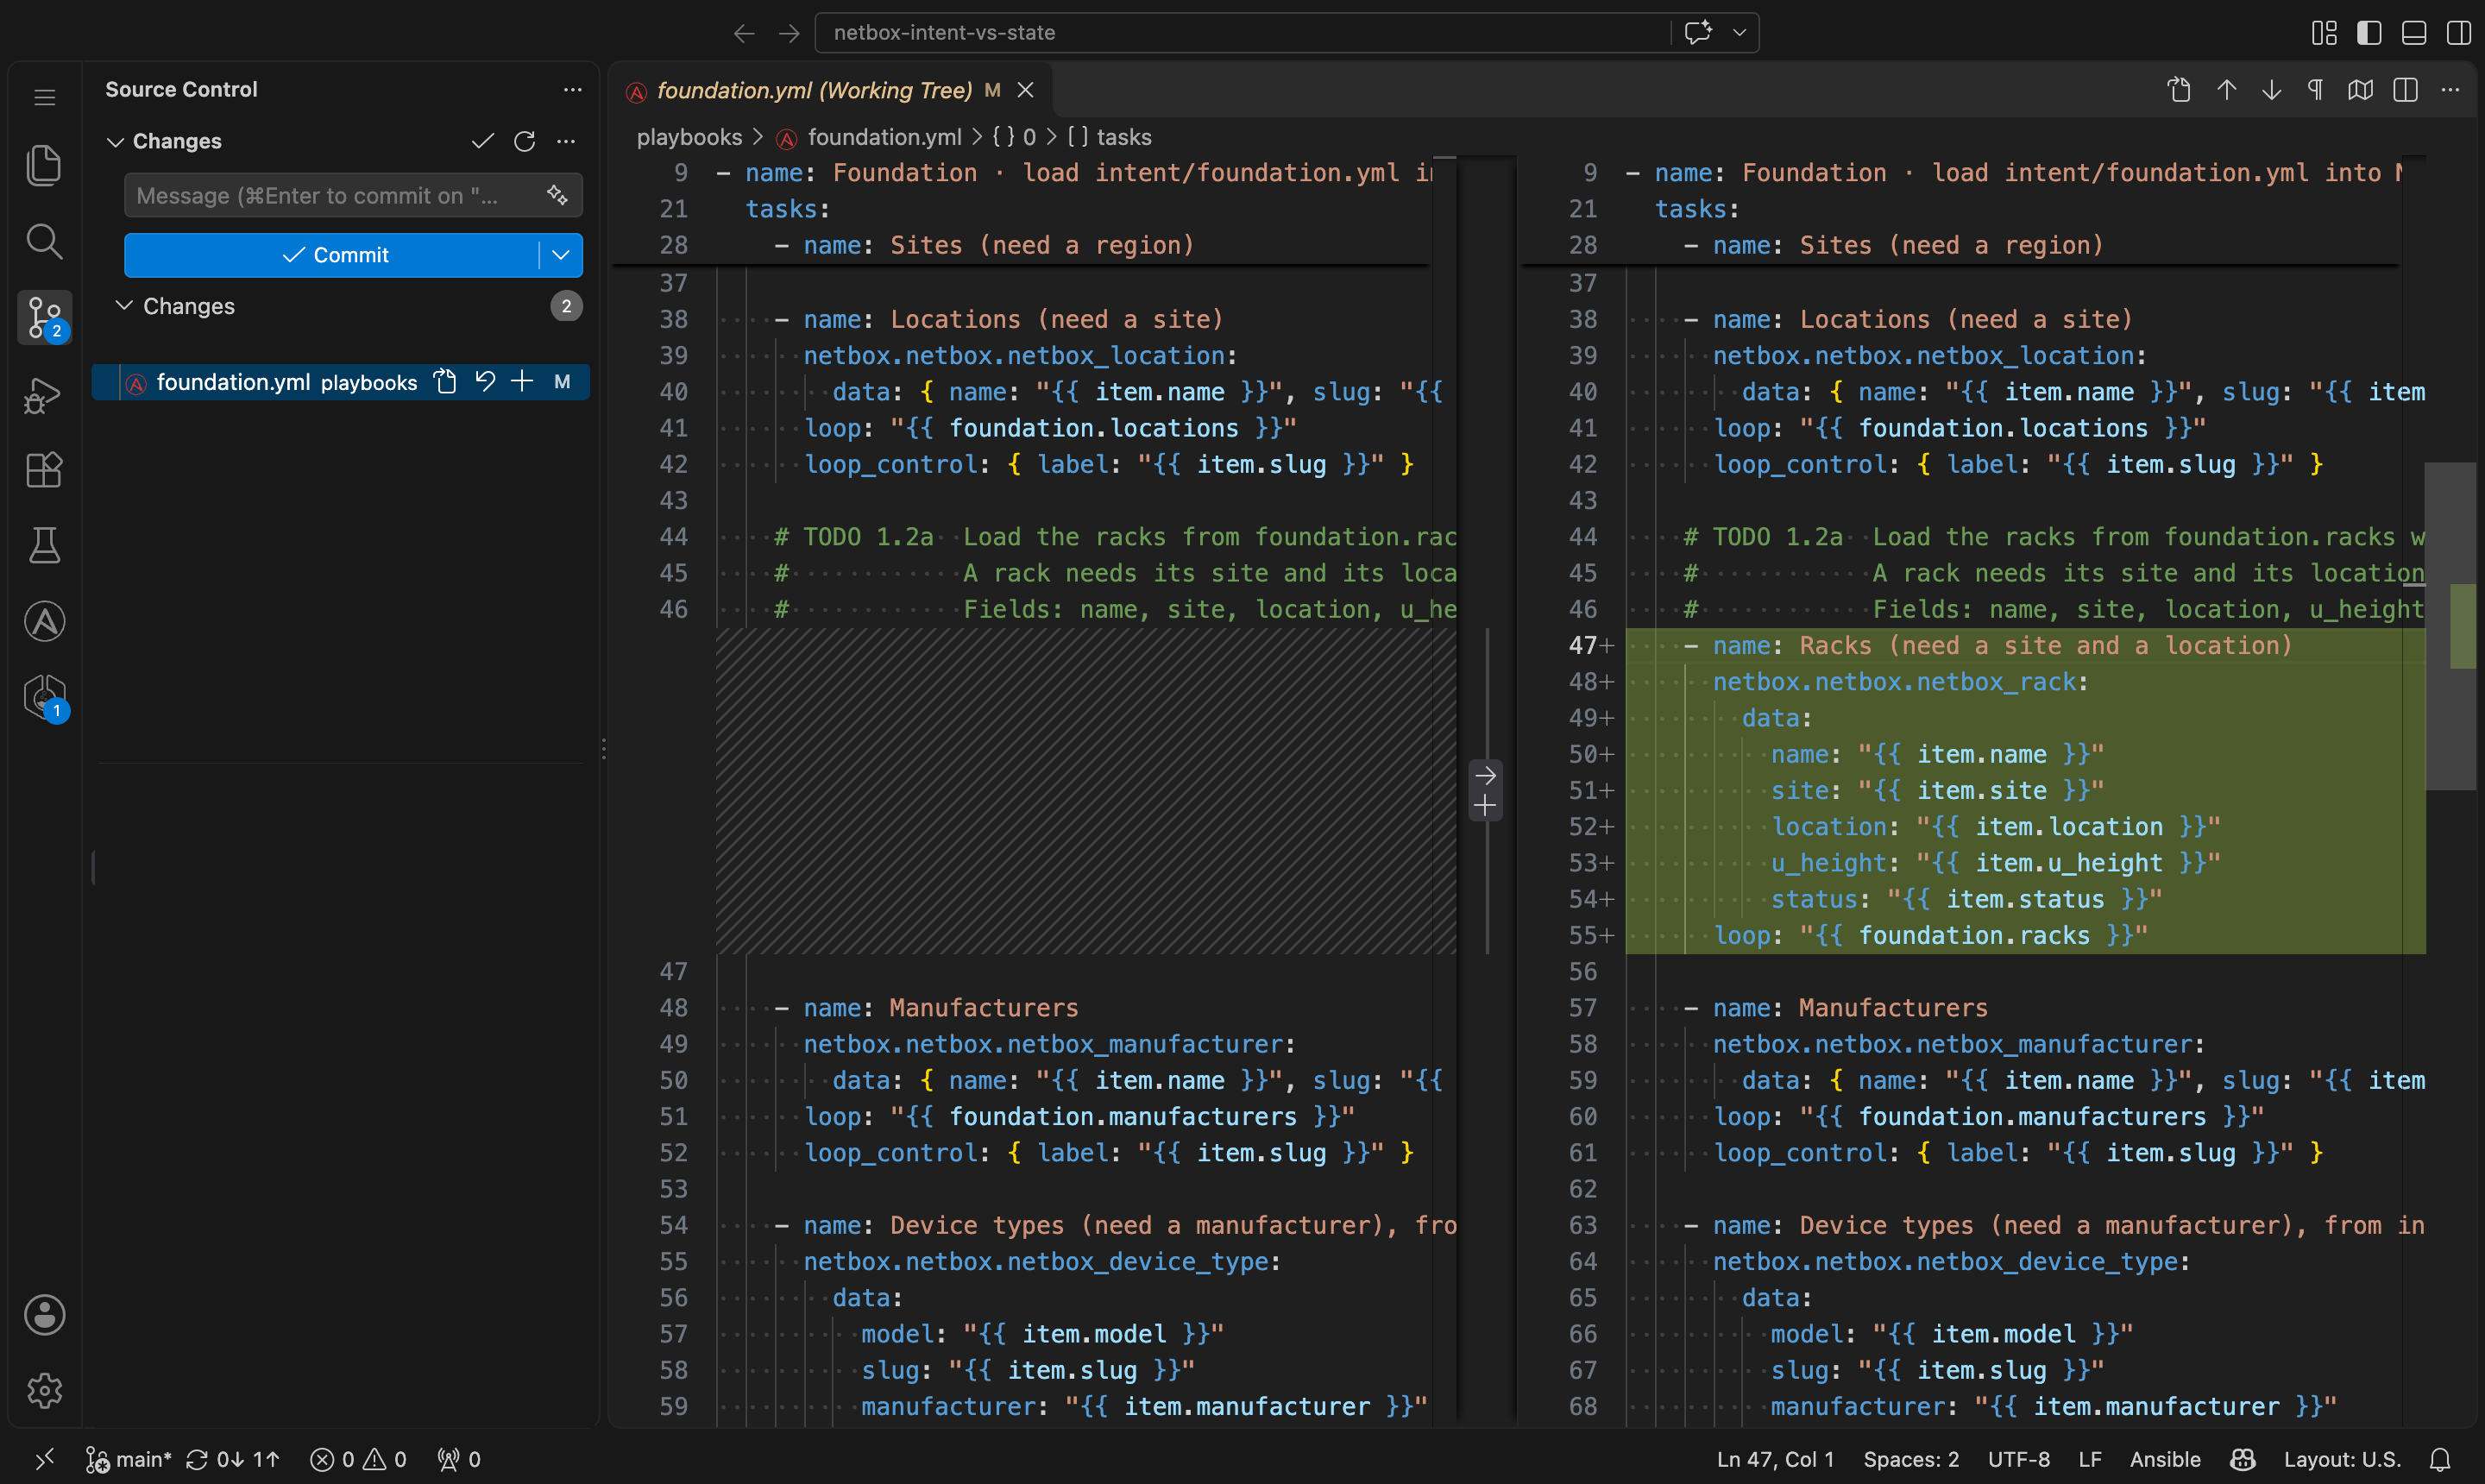
Stuck on a task? make solve T=1.2 copies in the finished files and git diff shows you what the answer
changed. Read it, understand it, keep going. No shame; that’s what it’s for.
10 · When something goes wrong
| You see | Try |
|---|---|
| The starting page sits on one step for more than 10 minutes | Reload it. Still stuck? Open github.com/codespaces: if the codespace shows an error, delete it there and click Open the lab again for a fresh one |
| The lab says This lab isn’t running | It stopped after 20 idle minutes. Click Open it again: your files are still there |
| The guide or VS Code tab is blank | Click the reload arrow, top right in the lab app. VS Code takes a few seconds to load the first time |
make status shows a red ✗ | run the command it suggests (usually make up) and wait a minute |
make ssh says no such container | the switches aren’t started: make up (or the command the lab’s first task gives) |
| A login page says CSRF verification failed | open the service from its own tab in the lab app (or localhost on a laptop), not another address |
| VS Code shows Restricted Mode and the terminal won’t start | Click Restricted Mode in the bottom-left corner and trust the folder |
| Codespaces says you’ve used your allowance | Wait for next month, add a budget in GitHub’s billing settings, or use the advanced setup |
command not found for a lab tool | You’re not in the lab. Run it in a terminal in the VS Code tab (on a laptop, the bottom-left corner says Dev Container when you’re in). |
| YAML error with a line number | Look at that line and the one above it: usually indentation, or a missing : |
NotImplementedError: TODO 2.1a is still open | that’s the gap you’re meant to fill: search for TODO 2.1a |
| Everything is slow | make down stops what you’re not using. On a laptop, give Docker more memory. |
Still stuck? Each lab’s first task has its own list for that lab. Otherwise open an issue on the lab repo with the command you ran and what it printed.
Advanced: run it on your laptop
Same lab, same dev container, on your own machine instead of GitHub’s. No allowance to run out, and it works offline once it’s built. You need a bit more setup and a laptop with memory to spare.
Install three things
- Docker. Docker Desktop (Mac, Windows), OrbStack (Mac) or Docker Engine (Linux). Give it at least as much memory as the lab’s page asks for (6 to 16 GB).
- Git. Macs ask to install it the first time you type
git. Windows: Git for Windows. - One way to open the lab: VS Code with the Dev Containers extension, or Node.js (for the
devcontainercommand, if you’d rather use the editor in your browser).
Check them from a terminal on your laptop (Terminal on a Mac, PowerShell on Windows):
docker version
git --version
Both should print a version. If docker version says it can’t connect, Docker Desktop isn’t running yet.
Open the lab
git clone https://gitlab.com/networkdoodles-labs/<lab>.git     # the lab page has the exact address
cd <lab>
Then pick one:
- VS Code:
code .(or File → Open Folder), then click Reopen in Container on the prompt in the bottom right. No prompt? Press F1, typereopen in container, press Enter. The bottom-left corner says Dev Container when you’re in. - Browser:
npx @devcontainers/cli up --workspace-folder ., wait for it to finish, then open http://localhost:8000. That’s the lab app; its VS Code tab is code-server, the editor in the screenshots above.
The first build takes about 5 minutes; later starts take about a minute. From there, everything on this
page is the same, except the lab’s web pages (NetBox, Grafana …) are on localhost at the ports its first task
lists.
No Docker allowed on your work laptop? VS Code’s Remote - SSH extension can open the dev container on any Linux machine you can SSH to that has Docker: a homelab box or a small cloud VM.
Ready
That’s everything. Pick a lab on the labs page and start with its first task: it shows you what’s in that lab, and you’ve already done the rest.